
Contents: Component placement/checking ⇊ Replacing the hub bearing ⇊ Removal and installation the fist ⇊
Component placement/checking
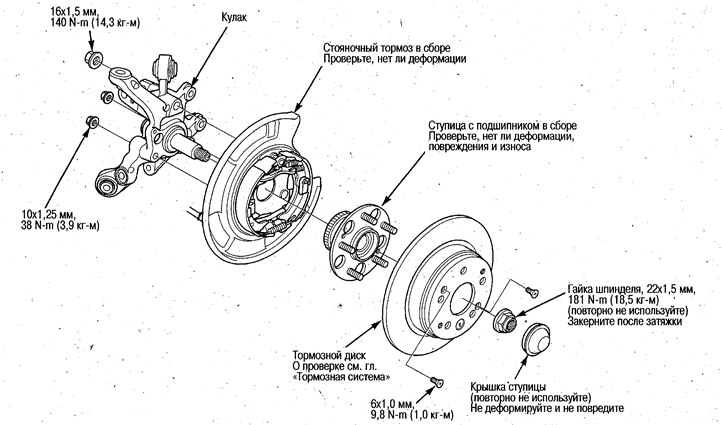
Attention:
- Before assembly, clean the contact surfaces of the wheel and brake disc, as well as the contact surfaces of the brake disc and hub.
- Remove the center cap of the alloy wheels from the inside of the wheel after removing it.
Replacing the hub bearing
1. Loosen the wheel nuts.
2. Using a jack, lift the car so that the wheels are raised.
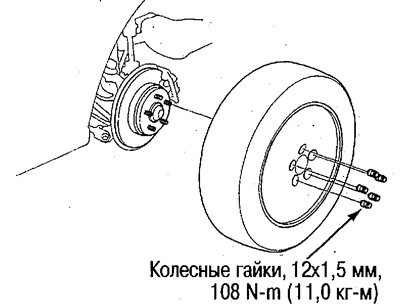
3. Remove the rear wheels.
Before installation, clean the contact surfaces of the wheel and brake disc.
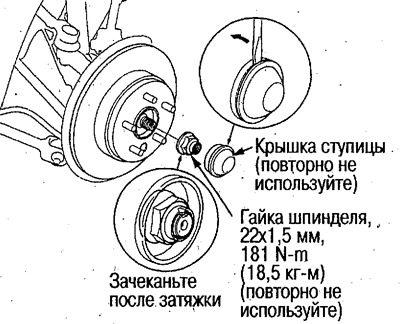
4. Remove the hub cover, unbolt the spindle lock nut and unscrew it.
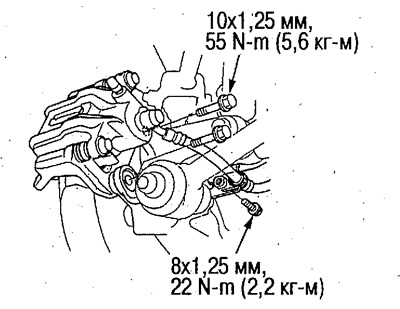
5. Unscrew the brake hose bracket bolt.
6. Unscrew the two brake caliper bracket mounting bolts, remove and hang the caliper on a wire.
Attention.
- Do not hang the caliper by the brake hose.
- Make sure that the caliper does not hit other components.
- Do not kink the brake hose.
7. Remove the screws (6 mm) from the brake disc. Tighten the two bolts (8 mm) as shown in the figure. Tighten the bolts evenly and remove the brake disc from the rear wheel hub.
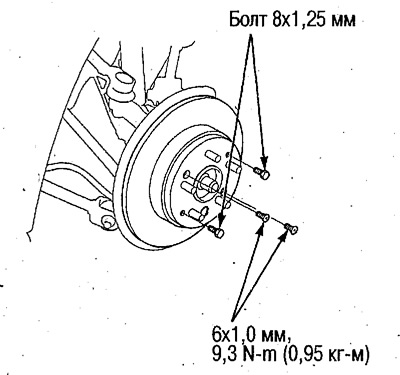
Caution: When installing the brake disc, thoroughly clean the mounting surfaces from rust and foreign particles.
8. Remove the hub with the bearing assembly.
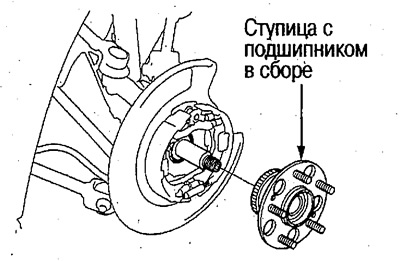
9. Install in the reverse order of removal. After tightening the spindle nut to the required force, score it.
Removal and installation the fist
1. Remove the hub with bearing assembly (see above).
2. Disconnect the upper arm from the knuckle.
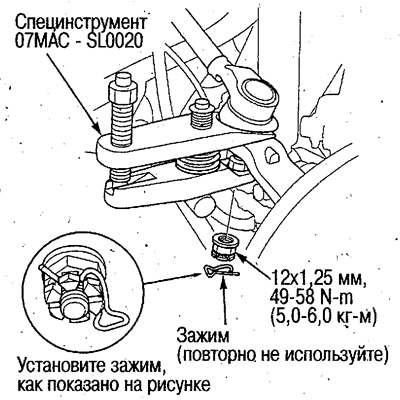
3. Remove the wheel sensor from the support disk (see chapter Brake system).
Do not disconnect the electrical wiring from the wheel sensor.
4. Disconnect the stabilizer link from the link bracket and unscrew the shock absorber mounting bolt.
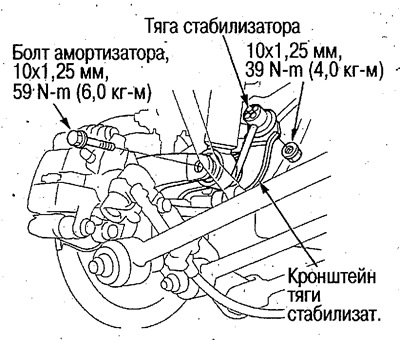
5. Disconnect the knuckle from the trailing arm and lower arm.
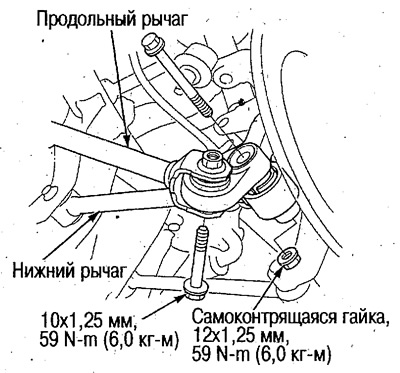
6. Disconnect the knuckle from the drive arm and control arm.
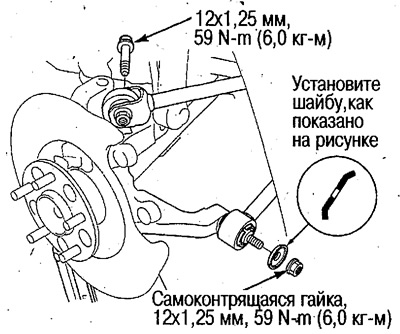
7. Disconnect the parking brake cable (see chapter Brake system).
8. Remove the fist.
9. Install in the reverse order of removal.
When installing the knuckle, tighten the suspension components in the following order:
After installing each component, tighten the bolts/nuts by hand. Transfer the weight of the car to the suspension by jacking it up. Tighten the bolts/nuts to the required torque.
10. Check and adjust the wheel alignment angles (see above).
[Original material on the website www.hondabook.ru]