
HondaBook.ru
Auto companies Volkswagen Auto companies Ford Auto companies Lada Auto companies Skoda Auto companies BMW Auto companies Mazda Auto companies Peugeot
English Русский
Български
Беларускі
Український
Српски
Hrvatski
Română
Polski
Slovenský
Magyar
Bookmark Contacts Sitemap   


Accord Civic Fit / Jazz CR-V HR-V Others Articles
HR-V 1 (1998-2006, petrol)

Clutch Master Cylinder — Disassembly and Assembly (Honda HR-V 1)

  • Main
  • Honda HR-V
  • 1 (1998-2006, petrol)
  • Transmission
  • Clutch
  • Clutch Master Cylinder — Disassembly and Assembly
0
Warning!
  • Do not spill brake fluid on your vehicle; it can ruin the paint; if brake fluid gets on the paint, wash it off immediately with water.
  • Clean all components in brake fluid and air dry; blow out all channels with compressed air.
  • Before assembly, wipe off dust and remove foreign particles from all components.
  • Replace components if directed.
  • Prevent dirt and other foreign substances from entering the brake fluid.
  • Do not mix brake fluid of different brands, as they may be incompatible.
  • Do not reuse drained brake fluid. Use only Genuine Honda Brake Fluid or equivalent DOT3 or DOT4 fluid.


1. Pry the ring clamp off the clutch master cylinder.
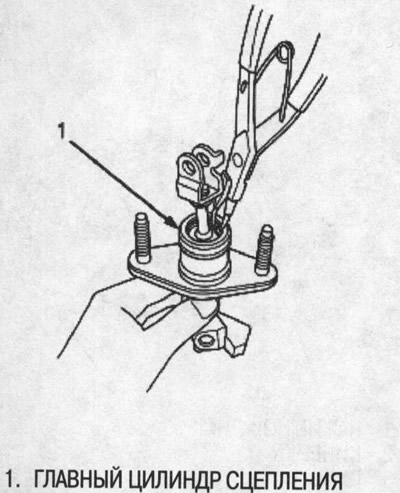
1. Pry the ring clamp off the clutch master…


2. Carefully push the piston out by applying compressed air through the clutch pipe.
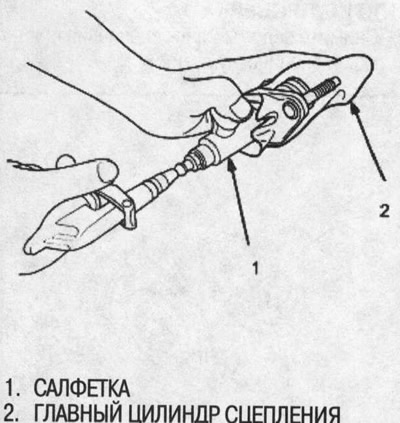
2. Carefully push the piston out by applying…


3. Assemble the piston, observing the direction of installation of the components (see above).


4. Insert the piston assembly into the clutch master cylinder.
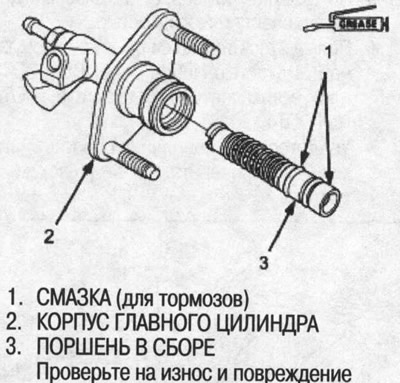
4. Insert the piston assembly into the clutch…


5. Insert the ring clamp into the groove of the clutch master cylinder.
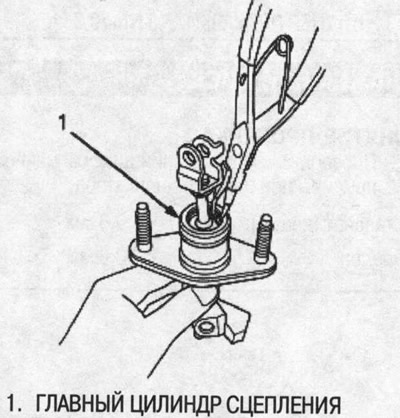
5. Insert the ring clamp into the groove of the…
This article is available at: russian, bulgarian, belarusian, ukrainian, serbian, croatian, romanian, polish, slovak, hungarian
This information has been verified: Emil Safonov
Share with friends:
◀ Previous
HR-V 1: Clutch
Next ▶

Clutch Master Cylinder — Replacement
Clutch Master Cylinder — Repair and Inspection
Clutch pedal — design and adjustment
Description of the clutch design
Clutch slave cylinder — repair and inspection
Clutch slave cylinder — replacement
Pressure plate — removal and inspection
Clutch slave disc — removal and inspection
Clutch flywheel — check and replacement
See also other articles from Honda manuals:
Clutch Master Cylinder — Removal and Installation Honda Accord 3 (1985-1989)
Removal and installation the clutch master cylinder Honda Civic 6 (1995-2000)
Clutch release master cylinder Honda Fit 1 (2001-2008)
Clutch master cylinder Honda CR-V 1 (1995-2001, petrol)
Master Cylinder and Brake Booster — Removal and Installation Honda Avancier 1 (1999-2003, petrol)
Link in different formats to this article
Comments and feedback from visitors
No comments yet


How much will 19 + 21 ?


HR-V 1 (1998-2006, petrol) 
  • General information
  • User manual
  • Maintenance
  • Power unit
  • Engine repair
  • Lubrication system
  • Cooling system
  • Fuel injection and control
  • Power and exhaust system
  • Engine electrical equipment
  • Transmission
  • Clutch
  • Mechanical gearbox
  • Automatic gearbox
  • Rear differential
  • Drive shafts and cardan
  • Chassis and running gear
  • Steering
  • Car suspension
  • Brake system
  • Body and interior
  • Exterior (external elements)
  • Interior (internal elements)
  • Doors, locks and windows
  • Electrical equipment
  • Equipment and devices
  • Lighting system
  • Electrical circuits
HondaBook.ru © 2018–2026 • Mobile version • Sitemap: EN BG BY UA RS HR RO PL SK HU • Feedback • Driver Information • Search system • Bookmark
Accord 3 (1985-1989) • Accord 6 (1997-2002) • Civic 3 and 4 (1983-1991) • Civic 5 and 6 (1991-2000) • Civic 6 (1995-2000) • Civic 7 (2000-2005) • Civic 8 (2005-2011) • Fit 1 (2001-2008) • CR-V 1 (1995-2001) • CR-V 2 (2002-2006) • HR-V 1 (1998-2006) • Avancier 1 (1999-2003) •
 
This website uses cookies to ensure proper functioning. By clicking "OK," you agree.