
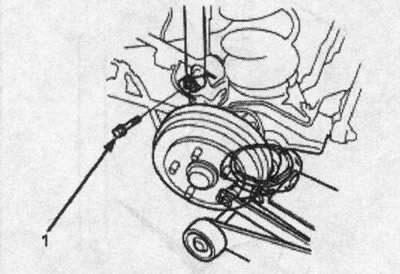
2. Remove the shoulder bolt from the rear axle beam.
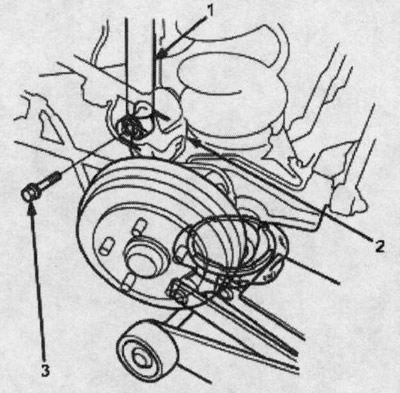
1. REAR SHOCK ABSORBER
2. REAR AXLE BEAM
3. BOLT WITH SHELL, 10x1.25 mm
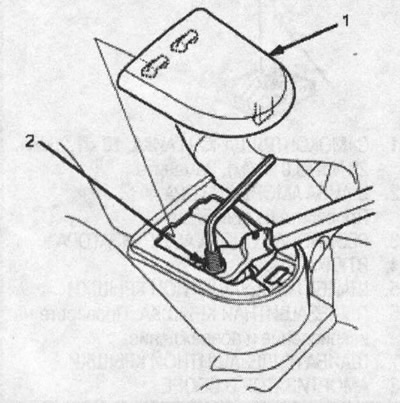
3. Remove the shock absorber inspection panel.
4. Loosen the self-locking nut.
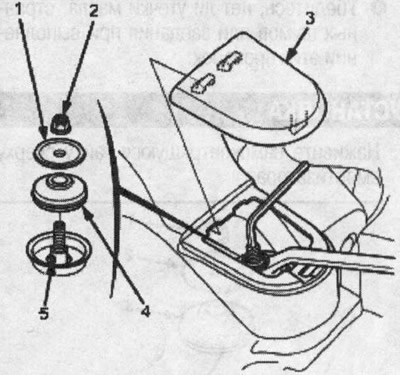
1. WASHER
2. SELF-LOCKING NUT, 10x1.25 mm. Replace.
3. SHOCK ABSORBER VISION PANEL
4. SHOCK ABSORBER RUBBER BEARING
5. SHOCK ABSORBER ROD
5. Remove the shock absorber from the car
Examination
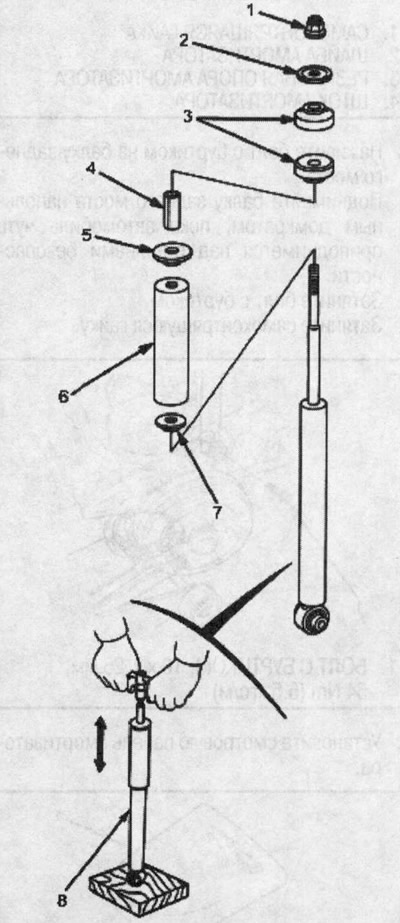
1. SELF-LOCKING NUT, 10x1.25 mm, 29 Nm (3.0 kgf/m). Replace.
2. SHOCK ABSORBER WASHER. Check for looseness.
3. SHOCK ABSORBER RUBBER BEARING
4. BUSHING
5. DUST COVER WASHER
6. DUST COVER. Check for bending and damage.
7. DUST COVER WASHER
8. SHOCK ABSORBER ASSEMBLY
Check for smooth operation over the entire stroke, both in compression and extension. The shock absorber should move smoothly. Otherwise (does not shrink or stretch) there is a gas leak somewhere and the shock absorber should be replaced.
Check for oil leaks, strange noises, or sticking when performing these checks.
Installation
1. Thread the self-locking nut on top of the shock absorber.
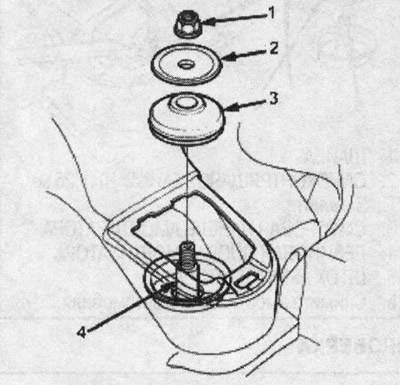
1. SELF-LOCKING NUT
2. SHOCK ABSORBER WASHER
3. SHOCK ABSORBER RUBBER BEARING
4. SHOCK ABSORBER ROD
2. Fit the shoulder bolt onto the rear axle beam.
3. Raise the rear axle carrier with a floor jack until the vehicle is slightly above the safety bars.
4. Tighten the shoulder bolt.
5. Tighten the self-locking nut.
1. BOLT WITH SHELL, 10x1.25 mm, 54 Nm (5.5 kgf/m)
6. Install the shock absorber inspection panel.
1. SELF-LOCKING NUT, 10x1.25 mm, 29 Nm (3.0 kgf/m). Replace.
2. SHOCK ABSORBER VISION PANEL
7. Install the rear wheel.