
Contents: Checking the shock absorber ⇊ Assembly ⇊
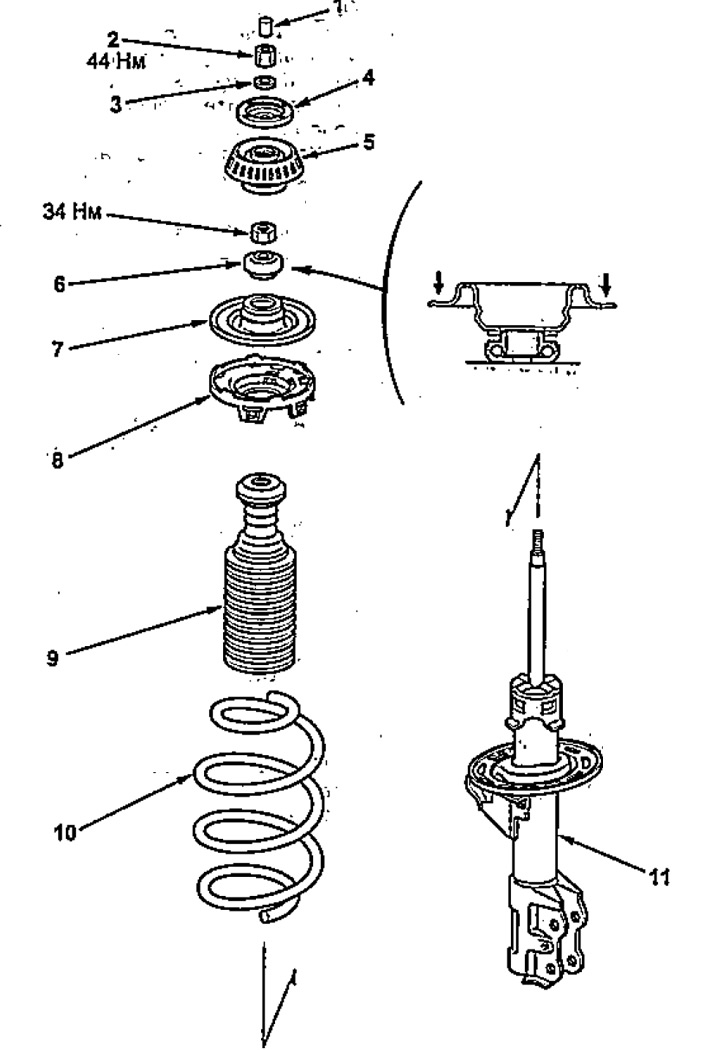
Disassembly and assembly of the front suspension strut.
1 - plug,
2 - nut,
3 - washer,
4 - rack support,
5 - pillow,
6 - bearing,
7 - upper spring seat,
8 - upper spring seat gasket,
9 - compression stroke limiter,
10 - spring,
11 - rack assembly.
1. Install the front suspension strut in the special device and compress the spring.
Caution: Do not compress the spring more than necessary to loosen the stem nut.
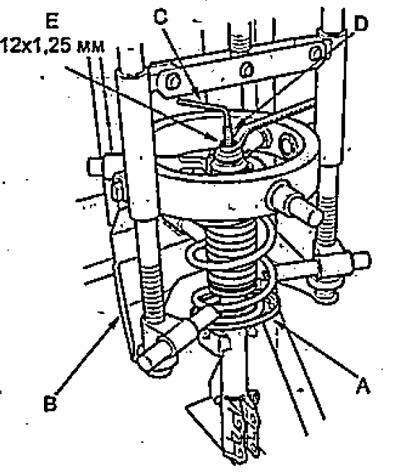
A - stand,
B - special device,
C - hexagon,
D - rod,
E - nut.
2. While holding the shock absorber rod with a hex key, loosen the shock absorber rod nut.
3. Disassemble the front suspension strut.
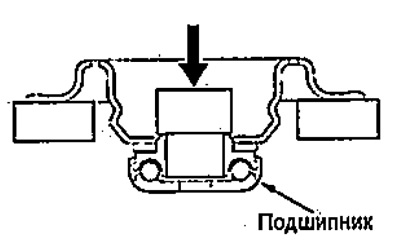
Note: Use a drift to press the bearing out of the upper spring seat.
Checking the shock absorber
1. Remove the front shock absorber from the vehicle.
2. Check the shock absorber for damage and leaks.
3. Check the rubber bushing for damage and wear.
4. Compress and stretch the shock absorber at least three times. Make sure that the resistance to movement does not change and there are no extraneous sounds.
a) Compress the shock absorber and release it.
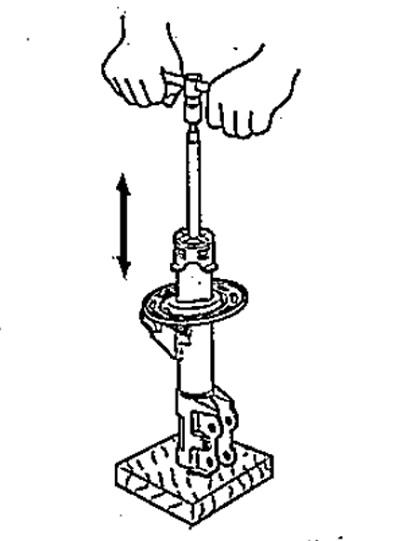
b) Make sure the plunger comes out completely at normal speed.
Replace the shock absorber if necessary.
Assembly
1. Install the bearing onto the upper spring seat. Slowly press down on the upper spring seat as shown in the figure.
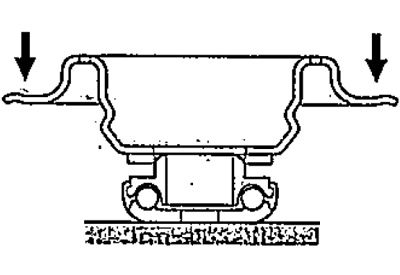
2. Install the upper seat, springs on the upper spring seat gasket.
Note: Make sure the top spring seat is securely seated on the seat gasket and does not pinch the flange.
3. Apply a small amount of silicone grease to the surface of the compression stop.
4. Install the compression stroke stop on the upper spring seat.
5. Install the spring seat gasket onto the strut spring so that the upper end of the spring rests against the stop as shown in the figure.
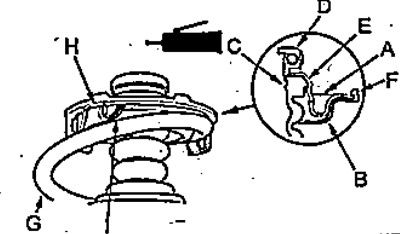
A - upper spring seat,
B - spring seat gasket,
C - spring compression stroke limiter,
D - bearing,
E - the upper part of the limiter,
F - side,
G - spring,
H - the end of the upper coil of the spring,
I - emphasis.
6. Compress the spring using a special tool.
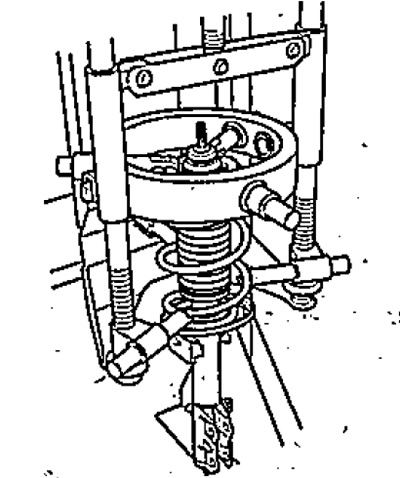
7. Assemble the rack according to the assembly drawing. Do not install the upper nut.
8. Align the end of the lower spring coil with the recess in the lower spring seat.
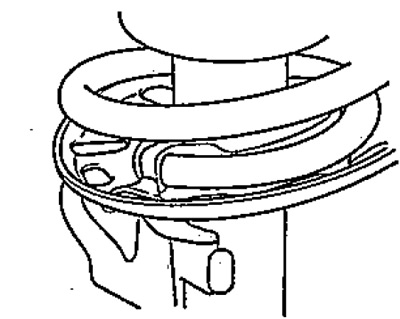
9. Compress the spring until the shock absorber rod contacts the bearing. Do not compress the spring too much.
10. Tighten the nut to the specified torque, securing the rod.
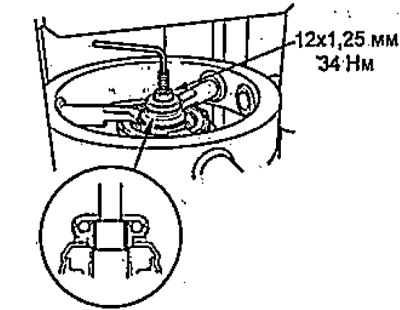
11. Remove the shock absorber from the special device.
Based on materials from the website: hondabook.ru