
Attention. Install the special tool accurately when removing the ball joints. If the special tool is installed incorrectly, the ball joint pin or boot may be damaged. Also, during operation, the special tool may come off and lead to unforeseen consequences.
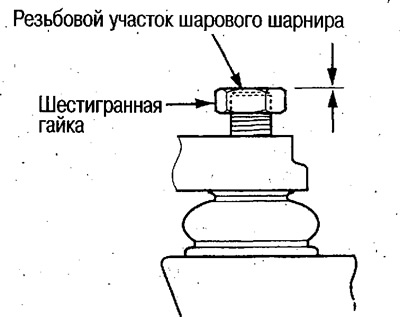
1. To prevent damage to the threads of the ball joint pin, tighten the hex nut until the end of the nut is aligned with the end of the ball joint pin.
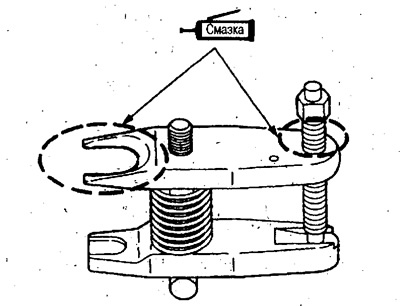
2. Apply grease to the areas shown in the illustration to protect the clamp bolt and to facilitate installation of the special tool.
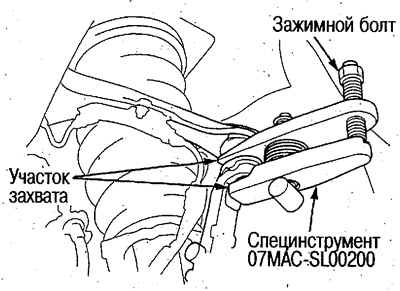
3. Install the special tool as shown in the figure. Do not damage the case during installation. Adjust the distance between the jaws by turning the clamping bolt.
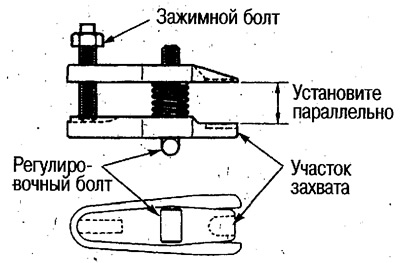
4. Turn the adjusting bolt until the grips are parallel to each other, then tighten the clamping bolt by hand and check again that they are parallel.
Attention. After adjusting the bolt, make sure that the head of the bolt is in the position shown in the figure.
5. Using a wrench, tighten the pressure bolt until the ball joint pin is released from the lever. If necessary, apply wetting fluid to loosen the ball joint pin.
6. Remove the special tool, unscrew the hex nut and remove the ball joint.
7. Check the ball joint boot and replace if damaged.