
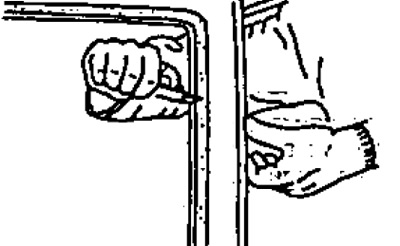
Attention: in order not to damage your hands with sharp edges, work with gloves.
1. Clean the contact surface of the body from the adhesive, leaving 1-2 mm of adhesive on the surface.
Note: If all the adhesive was removed when cutting, clean the body surface with a piece of cloth soaked in solvent and wait 30 minutes. Then cover the surface of the body with a new layer of glue 2 mm thick.
2. Clean and degrease the glass surface and the glass contact surface on the body around the entire perimeter.
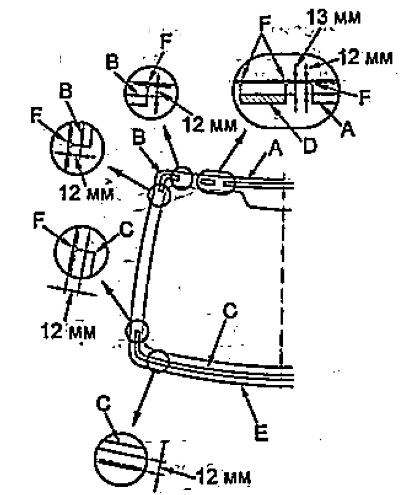
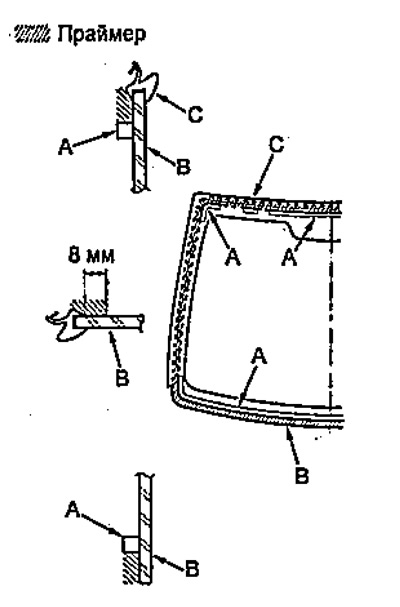
3. Apply new seals (A, B and C) and stoppers (D) on the inside of the glass (E) labels (R), as it shown on the picture.
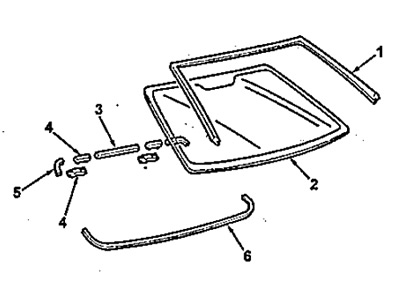
Windshield.
1 - glass molding,
2 - windshield,
3 - upper glass seal,
4 - stopper,
5 - corner glass seal,
6 - lower glass seal.
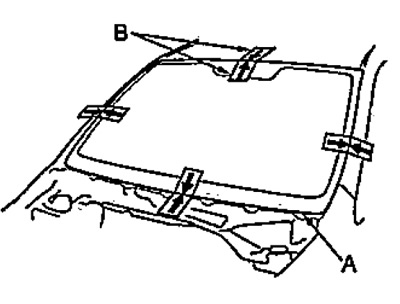
4. Install the top molding (A) on sticky tape (WITH) on glass (IN) according to the marks, as shown in the figure.
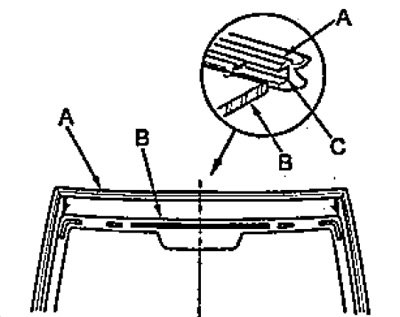
5. Install stoppers (A) on the body as shown in the picture.

6. Install glass (A) on the body. Apply alignment mark (IN) on the glass and body as shown in the figure.
Note: Do not damage the glass and painted body surfaces.
7. Remove the windshield.
8. Using a brush, apply a primer to the glass (IN) between the seal (A) and molding (WITH), as shown in the figure.
Attention: clean the surface from dirt and grease, do not touch the surface after applying the primer, otherwise the connection will not be tight.
Note: Use a primer designed for glass installation. The drying time of the primer is indicated in the instructions for use.
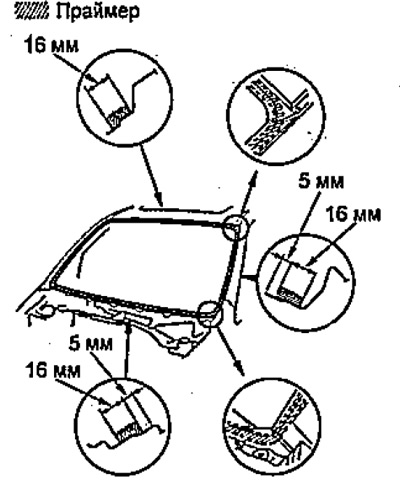
9. Using a brush, apply a primer to the body; as it shown on the picture. Wait 10 minutes.
Attention: clean the surface from dirt and grease, do not touch the surface after applying the primer, otherwise the connection will be leaky.
10. Apply glue (A) on the contact surface of the glass (WITH) between the seal (IN) and molding (D), as it shown on the picture. Wait 30 minutes.
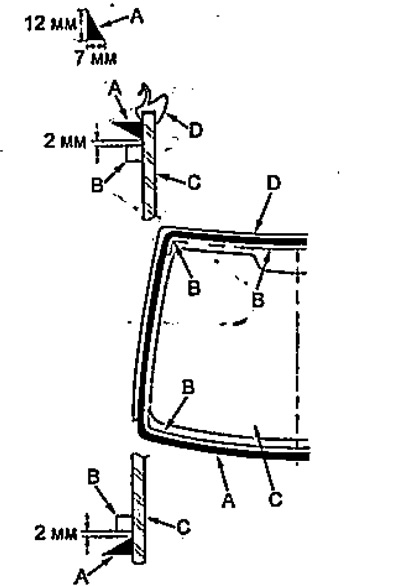
11. Establish glass on a body according to labels. Press lightly on the glass, first at the corners, then over the entire contact surface. Do not open or close car doors until the adhesive has dried.
12. Remove excess adhesive from the windshield or painted body surfaces.
13. Wait 1 hour. Check and repair leaks in the connection.
A) After the curing time has elapsed, check the tightness of the connection.
b) Repair leaks with automotive glass sealant.
14. Install the hood vent (see section "Removal and installation of a ventilating lattice of a cowl").
15. Install wiper arms and blades (see chapter "Body electrical equipment").
16. Install the interior rearview mirror (see section "Side and interior rearview mirror").