
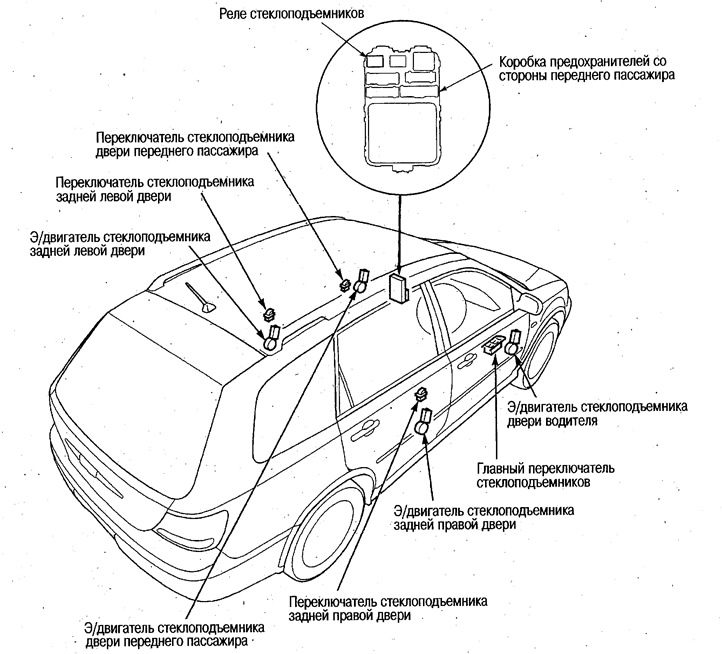
Location of components
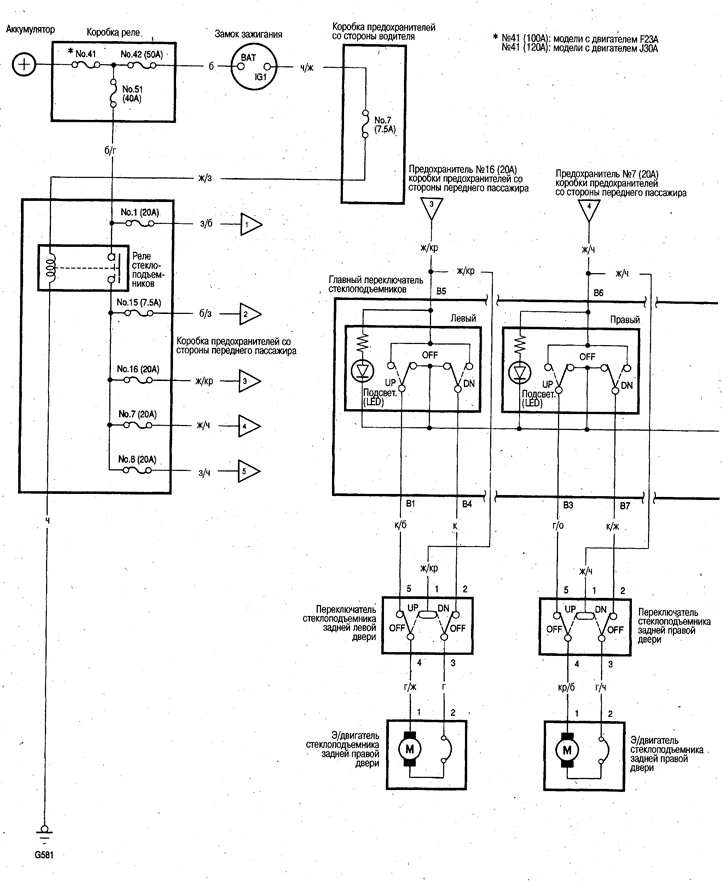
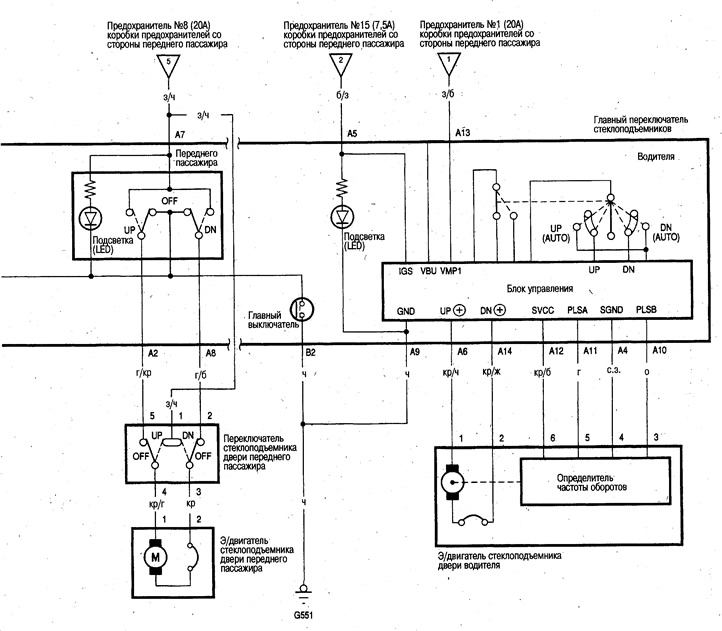
Wiring diagram
Driver's window reset
After performing the following work, the driver's door window regulator enters the backup mode and it becomes impossible to raise and lower the window with the main power window switch in automatic mode.
Disconnecting the battery cables.
Removing and installing fuse No. 1 (20A) fuse boxes on the passenger side.
Removing the 14-pin connector of the main power window switch.
Removal and installation of a window regulator, glass, directing.
Sometimes the system does not go into standby mode when performing the above work, so to reliably put the system into standby mode, follow the steps below. (If after performing these steps the window continues to rise and fall in automatic mode, re-transfer to backup mode).
Remove fuse #1 (20A) fuse boxes on the passenger side.
Turn the ignition key to the ON position (II), after an exposure of 1 sec. or more, turn the ignition key to the OFF position.
5 seconds or more after turning the ignition key to the OFF position, insert the fuse.
Driver's window self-learning procedure
1. Check if the driver's door is properly installed.
2. Start the engine.
3. Turn the main power window switch to down and fully lower the window.
4. Turn the main power window switch to up, fully raise the window and hold the switch down for another 1 second. and more.
If, after performing the above steps, the window does not rise and fall automatically, repeat the procedure.
Check of the e/motor of a window regulator of a door of the driver
1. Remove the door trim.
2. Disconnect the 6-pin connector from the power window motor.
3. Apply battery voltage to terminals #1 and #2 as shown in the figure and check that the e/motor rotates smoothly without abnormal sounds.
Attention. Disconnect the battery immediately when the window regulator reaches its extreme positions.
 | 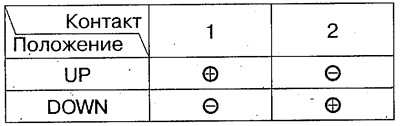 |
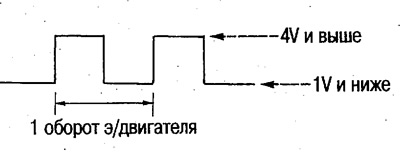
Checking the e/motor rotation determinant
4. Connect the 6-pin connector to the power window motor.
5. Measure the voltage between different contacts while the e/motor is running.
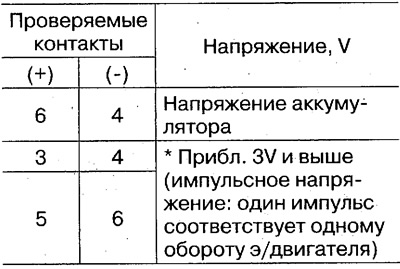
*: To test pulses, connect an oscilloscope to the pins to be tested. Sometimes you need to check the shape of the pulses.
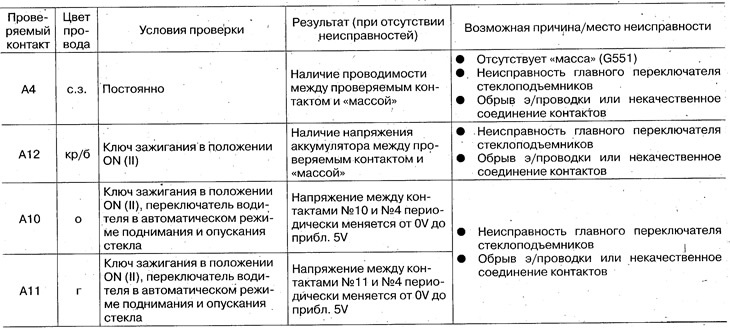
Checking the Input Signals of the Power Window Master Switch
1. Remove door trim (see ch. Body).
2. Disconnect the 14-pin and 7-pin connectors from the main power window switch.
3. Turn off 2 screws and remove the main switch of windows.

4. Check the input signals below and if they are OK and the power windows are not working properly, replace the power window master switch.
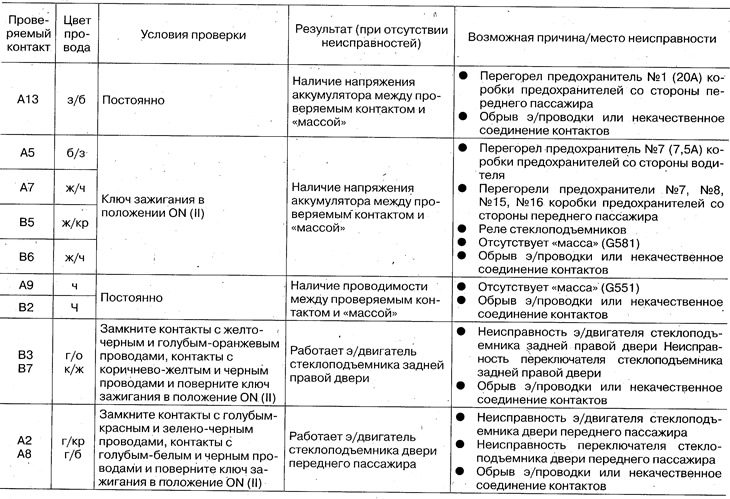
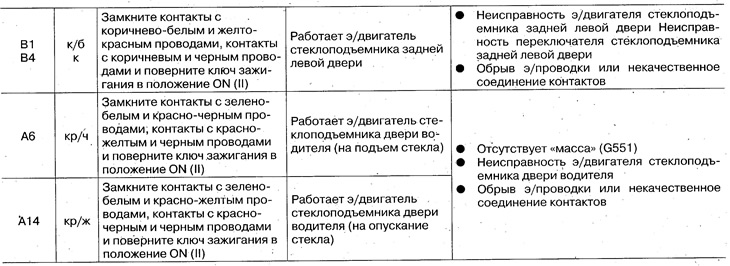
Connect the 14-pin connector to the power window master switch.
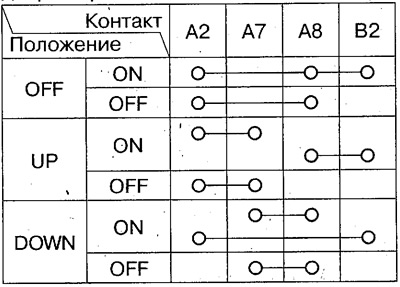
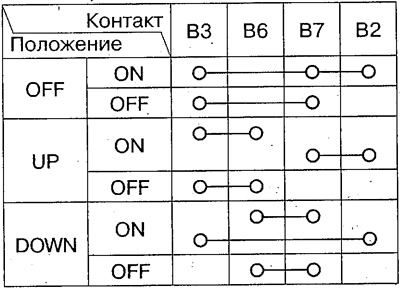
Checking the main power window switch
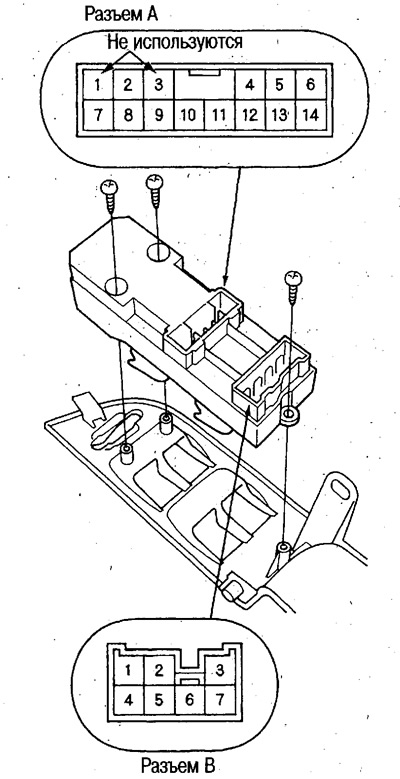
1. Remove the 3 screws and remove the main switch from the switch panel assembly.
2. Check the continuity between the contacts in different switch positions and make sure that there is continuity only between the contacts connected by lines in the figures.
Since the driver's door power window switch is integrated with the control unit, it is not possible to test the switch separately. Check the input signals at terminals A4, A6, A9, A10, A11, A12, A13, A14 of the main power window switch and, if everything is in order and the driver's door window does not work normally, then the driver's window switch is faulty.
Front Passenger Power Window Switch
Rear Right Power Window Switch
Rear Left Power Window Switch

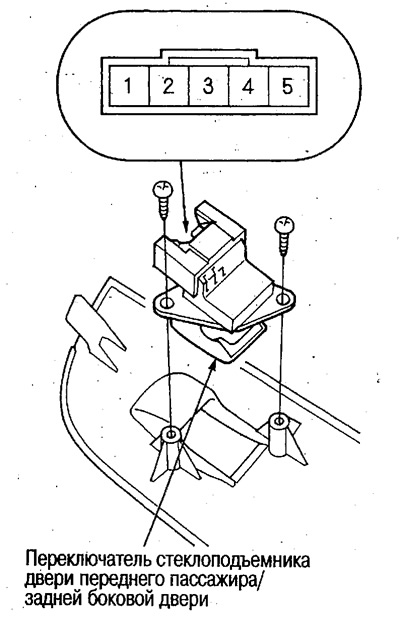
Front Passenger Door/Rear Side Door Power Window Switches
1. Remove front passenger door/rear side door trim (see ch. Body).
2. Disconnect the 5-pin connector from the switch.
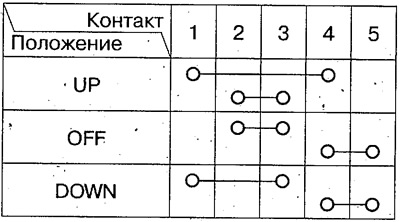
3. Check the continuity between the contacts in different switch positions and make sure that there is only continuity. between pins connected by lines in the table.
 |  |
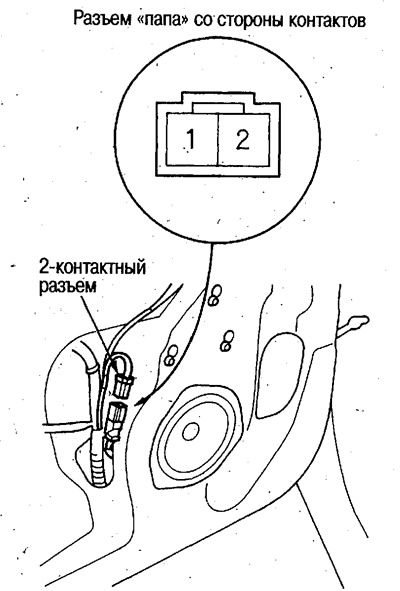
Check of e/motors of window regulators of a door of the forward passenger/rear lateral doors
1. Remove door trim (see ch. Body).
2. Disconnect the 2-pin connector e / engine.
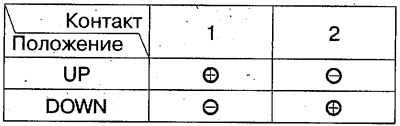
3. Apply battery voltage between pins #1 and #2 as shown in the figure, and check if the engine rotates smoothly without extraneous sounds.
Attention. Disconnect the battery immediately when the limit switch is reached.
 |  |