
If the rotation speed of the heater fan motor changes in accordance with the set modes of the rotation speed switch, then continue checking from point No.2. If the rotation speed of the electric motor does not change in accordance with the set modes of the fan speed switch, then go to point No.9.
2. Set the heater fan speed switch to the "OFF" position.
3. Make sure the ignition switch is in the "ON" position. If the heater fan motor rotates, go to step #4. If the motor does not rotate, go to step #9.
4. Turn the ignition key to the "OFF" position.
5. Disconnect the heater fan motor connector.
6. Disconnect the heater fan resistor connector.
7. Disconnect the heater fan speed switch connector.
8. Check for continuity between ground and terminals 1, 2, 4 and 5 of the heater fan speed switch connector, as shown in the figure.
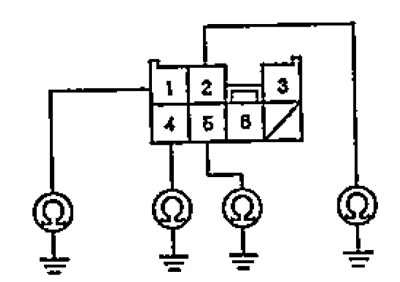
If continuity is present, repair short circuit in heater blower motor wiring harness, heater blower resistor, and heater blower speed switch. If continuity is absent, replace heater blower speed switch.
9. Turn the ignition key to the "OFF" position.
10. Disconnect the heater fan resistor connector.
11. Check the heater fan resistor for proper operation.
If the resistor is OK, go to step #12. If the resistor is bad, it should be replaced.
12. Connect the heater blower resistor connector.
13. Disconnect the heater fan speed switch connector.
14. Turn the ignition key to the "ON" position.
15. Short the terminals of the heater fan speed switch connector to ground in the sequence 2, 1, 4, 5.
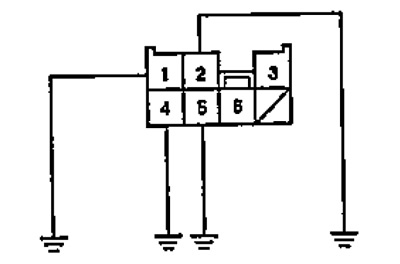
If the heater blower motor speed increases, replace the heater blower speed switch. If the motor does not turn, repair opens in the wiring harness between the heater blower resistor and the heater blower speed switch.
16. Set the heater fan speed switch to the "OFF" position and turn the ignition key to the "OFF" position.
17. Check the serviceability of fuses No.5 (40A) and No.10 (7.5A) in the fuse box.
If the fuses are good, go to step #16. If the fuses are bad, replace the fuses and retest.
18. Short the terminal No.2 of the heater fan motor connector to ground.
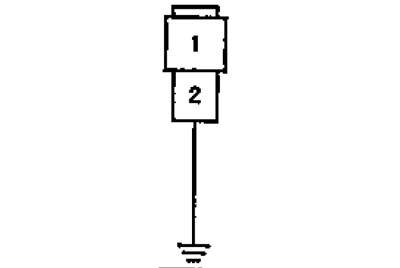
19. Turn the ignition key to the "ON" position.
If the heater fan motor rotates, go to step #20; if the heater fan motor does not rotate, go to step #27.
20. Turn the ignition key to the "OFF" position.
21. Disconnect terminal No.2 of the heater fan motor connector from ground.
22. Disconnect the heater fan speed switch connector.
23. Short-circuit terminal No.5 of the heater fan speed switch connector to ground using a wire, as shown in the figure.
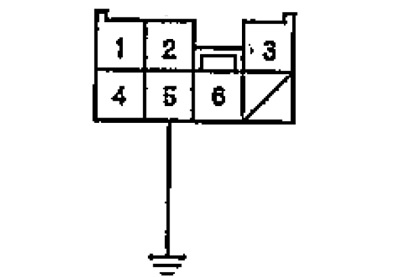
24. Turn the ignition key to the "ON" position. If the heater fan motor rotates, go to step #25, if the motor does not rotate, repair the open circuit between the motor and the heater fan speed switch.
25. Turn the ignition key to the "OFF" position.
26. Check the conductivity between terminal No.3 of the heater fan speed switch connector and ground.
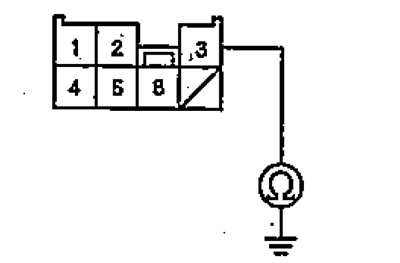
If continuity is present, the heater fan speed switch should be replaced. If there is no continuity, check the wiring harness between ground and the heater fan speed switch for an open circuit; if there is no open circuit, check for continuity between terminal "G402" and ground.
27. Disconnect the ground wire from terminal #3 of the heater fan speed switch.
28. Disconnect the heater fan motor connector.
29. Measure the voltage between ground and terminal No.1 of the heater fan motor connector.
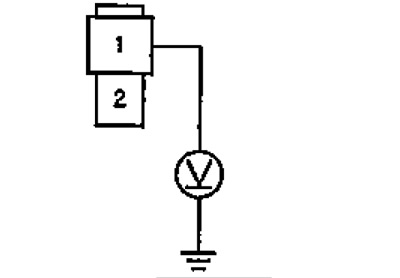
If the voltage matches the battery voltage, then the heater fan electric motor should be replaced. If it does not, then go to step #30.
30. Turn the ignition key to the "OFF" position.
31. Check the heater fan motor relay. If the relay is OK, go to step #32; if the relay is faulty, it should be replaced.
32. Measure the voltage between ground and terminal No.1 of the heater fan motor relay connector.
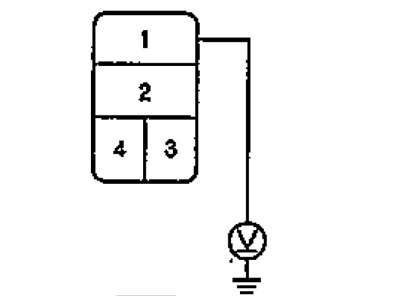
If the voltage corresponds to the battery voltage, then go to step #33; if it does not correspond to the battery voltage, then you should eliminate the open circuit between the heater fan motor relay and fuse #5 (40 A) of the fuse box.
33. Turn the ignition key to the "ON" position.
34. Measure the voltage between ground and terminal No.4 of the heater fan motor relay connector.
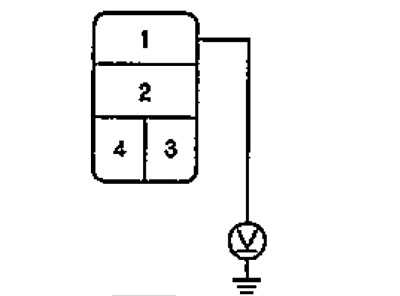
If the voltage matches the battery voltage, then go to step #35. If it does not match the battery voltage, then you should eliminate the open circuit between the heater fan motor relay and fuse #10 (7.5 A) in the fuse box.
35. Turn the ignition key to the "OFF" position.
36. Check the conductivity between ground and terminal No.3 of the heater fan motor relay connector.
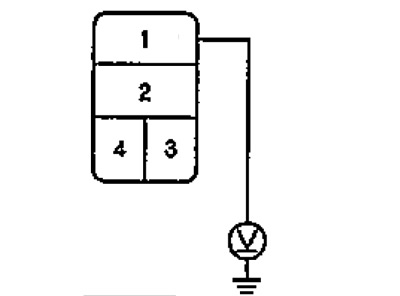
If there is continuity, then the open circuit between the heater fan motor relay and the heater fan motor should be repaired.
If there is no continuity, check the wiring harness between the heater fan motor relay and ground for a break; if there is no break, check for continuity between terminal "G402" and ground.
The original can be found on the resource HondaBook.ru