HondaBook.ru
Auto companies Volkswagen Auto companies Ford Auto companies Lada Auto companies Skoda Auto companies BMW Auto companies Mazda Auto companies Peugeot
English Русский
Български
Беларускі
Український
Српски
Hrvatski
Română
Polski
Slovenský
Magyar
Bookmark Contacts Sitemap   


Accord Civic Fit / Jazz CR-V HR-V Others Articles
Accord 3 (1985-1989) Accord 6 (1997-2002)

Removal and installation interior door trim panels (Honda Accord 6)

  • Main
  • Honda Accord
  • 6 (1997-2002)
  • Body and interior
  • Interior (internal elements)
  • Removal and installation interior door trim panels
0
Contents: Removal ⇊ Installation ⇊
Caution: Wear gloves to protect your hands from cuts when performing procedures through access holes in the door frame.


Removal


Removal


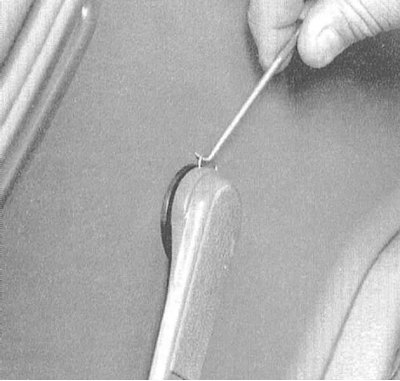
1. On models with manual windows, remove the window up/down handle.

2. Remove the door lock release button.

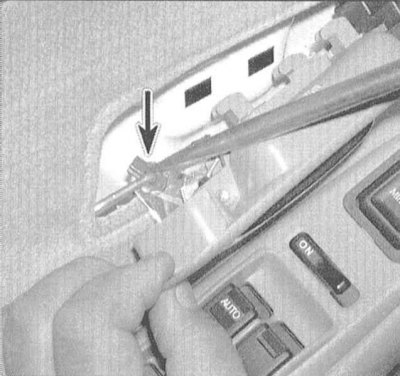
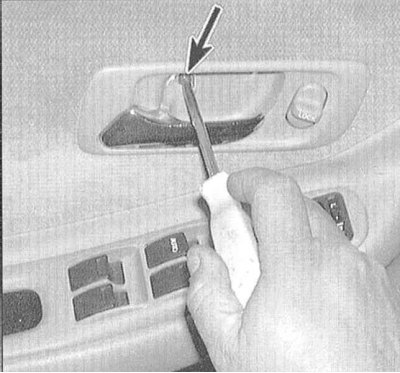
3. To remove the interior door handle, remove the plastic protective cap and unscrew the single mounting screw. Release the handle assembly from the door panel and disconnect the actuator rod from it. If the vehicle is equipped with this equipment, disconnect the electrical wiring of the lock actuator.
3. To remove the interior door handle, remove the…

3. To remove the interior door handle, remove the…


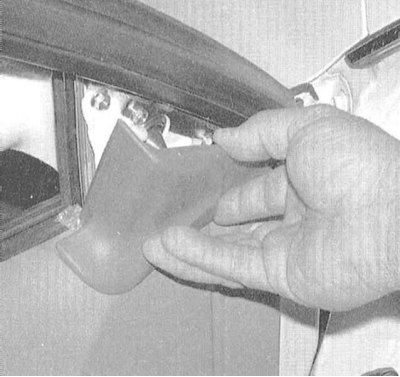
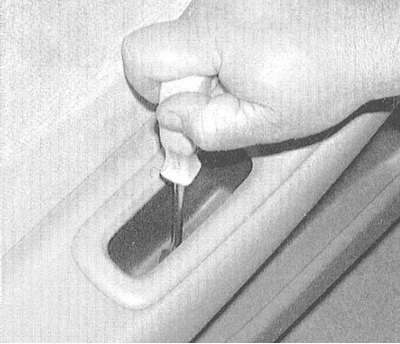
4. Remove the decorative cover of the outer support unit of the rearview mirror.


4. Remove the decorative cover of the outer…


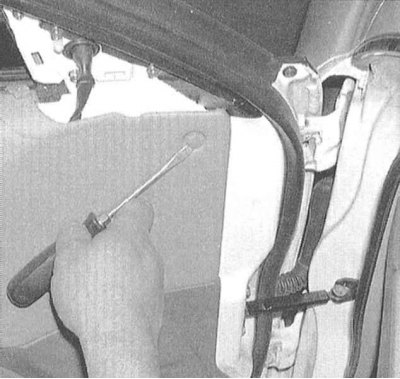
5. Remove the screws securing the interior trim panel and the screw securing the armrest assembly, then carefully pull the panel toward you, releasing the fastening clips. Moving along the perimeter of the panel, release all the clips one by one.

Note: The tabs are located far enough under the edge of the panel to allow a standard pry tool to be used to pry the panel out.
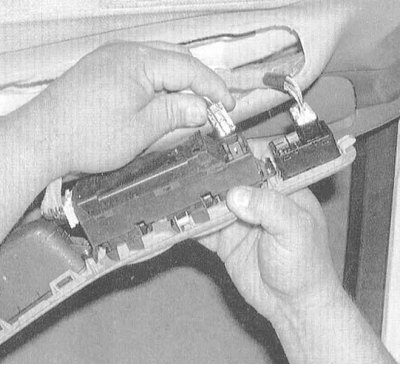

Note: The tabs are located far enough under the…

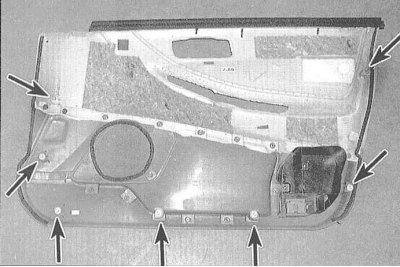
6. Once all fasteners have been released, disconnect all remaining electrical connectors and remove the panel from the door frame.
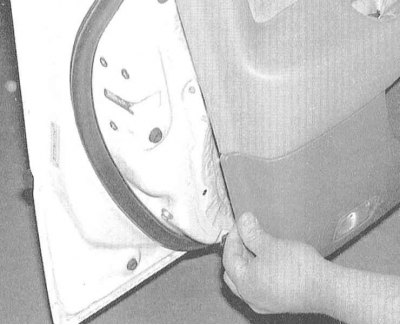


6. Once all fasteners have been released,…

6. Once all fasteners have been released,…


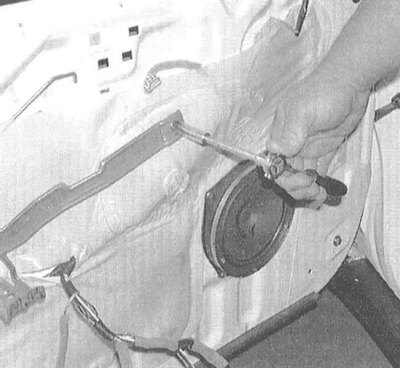
7. To gain access to the outside handle and window regulator located inside the door frame, remove the power window control assembly (if equipped), the panel door mounting bracket and the speaker assembly (see Chapter On-board electrical equipment), then carefully separate the plastic moisture shield.


Installation


1. Before installing the interior trim panel, make sure that all its fasteners are in place and in good condition.

2. If the vehicle is equipped, connect the wiring to the door lock actuator and the power window control panel. Install the panel to the door. Snap all the fasteners securely into place. Install and screw the interior handle assembly into place. Install the lock switch (if equipped)/storage pocket (tighten the mounting screw securely). Install the manual window handle/power window control assembly.

(The original text of the article is located on the website «www.HondaBook.ru»)
This article is available at: russian, bulgarian, belarusian, ukrainian, serbian, croatian, romanian, polish, slovak, hungarian
This information has been verified: Timofey Goryachev
Share with friends:
◀ Previous
Accord 6: Interior (internal elements)
Next ▶

Caring for upholstery and carpeting
Caring for Vinyl Trim Elements
Removal and installation window regulators
Removal and installation the center console
Removal and installation trim sections of the instrument panel
Removal and installation the steering column cover
Removal and installation the main section of the instrument panel
See also other articles from Honda manuals:
Removal and installation interior door trim Honda Civic 6 (1995-2000)
Interior trim — removal and installation Honda Fit 1 (2001-2008)
Interior trim Honda CR-V 2 (2002-2006, petrol)
Interior trim — design description Honda HR-V 1 (1998-2006, petrol)
Removal and installation front door trim Honda Avancier 1 (1999-2003, petrol)
Link in different formats to this article
Comments and feedback from visitors
No comments yet


How much will 34 + 32 ?


Accord 6 (1997-2002) 
  • General information
  • Introduction to the guide
  • User manual
  • Maintenance
  • Power unit
  • Four-cylinder engines
  • Six-cylinder engines
  • Engine overhaul
  • Cooling system
  • Heater and air conditioner
  • Power and exhaust systems
  • Engine electrical equipment
  • Engine management
  • Transmission
  • Mechanical gearbox
  • Automatic gearbox
  • Clutch and drive shafts
  • Chassis and running gear
  • Brake system
  • Car suspension
  • Steering
  • Body and interior
  • Exterior (external elements)
  • Interior (internal elements)
  • Electrical equipment
  • Equipment and devices
  • Electrical circuits
Accord 3 (1985-1989) 
  • General information
  • Maintenance
  • Power unit
  • Engine adjustment
  • Engine repair
  • Engine electrics
  • Emission management
  • Engine management (carburetor)
  • Electronic injection
  • Programmable injection
  • Schematic of emission system
  • Fuel system
  • Feedback management
  • Transmission
  • Manual gearbox
  • Automatic gearbox
  • Clutch
  • Chassis and running gear
  • Front suspension
  • Rear suspension
  • Steering
  • Brake system
  • Electrical equipment
  • Ventilation and heating
  • Air conditioner
  • Cruise control system
  • Equipment and devices
HondaBook.ru © 2018–2026 • Mobile version • Sitemap: EN BG BY UA RS HR RO PL SK HU • Feedback • Driver Information • Search system • Bookmark
Accord 3 (1985-1989) • Accord 6 (1997-2002) • Civic 3 and 4 (1983-1991) • Civic 5 and 6 (1991-2000) • Civic 6 (1995-2000) • Civic 7 (2000-2005) • Civic 8 (2005-2011) • Fit 1 (2001-2008) • CR-V 1 (1995-2001) • CR-V 2 (2002-2006) • HR-V 1 (1998-2006) • Avancier 1 (1999-2003) •
 
This website uses cookies to ensure proper functioning. By clicking "OK," you agree.