Note:
- Keep dust out of the work area.
- When working at low temperatures, heat the door guide and film with a hair dryer. Door guide: approx. 15°C. Door guide film: approx. 30°C.
- When heating the film of the door guide, do it evenly and gradually so that the film does not deform.
- When sticking the film, press it slowly from the corner to avoid trapping air bubbles and wrinkling.
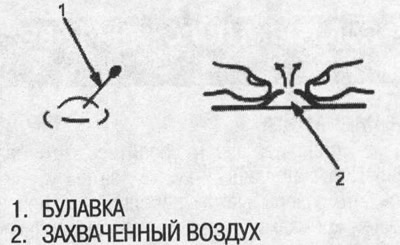
- If air does get under the film, pierce the bubbles with a pin and release the air by pressing with your finger or a plastic scraper.
- If air bubbles exceed 10 mm in diameter, rewind the film and repeat the sticker.
1. The following tools are required to replace the door rail waterproof film:
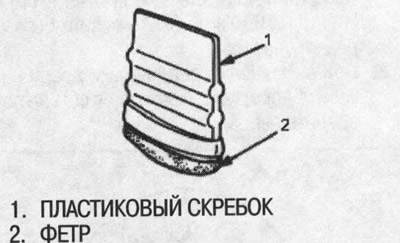
- plastic scraper
- Alcohol
- Sponge or napkin
- hair dryer
- Pin
2. Remove the following components:
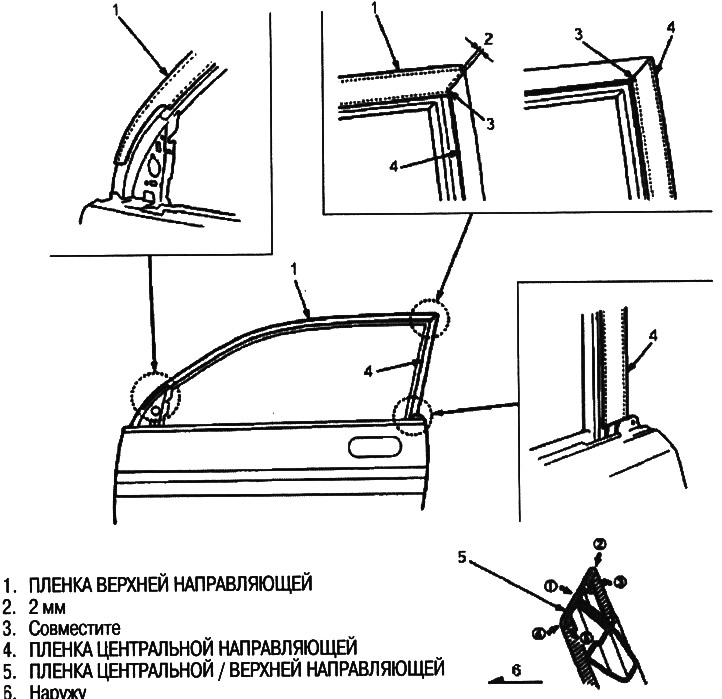
- Replacing the waterproof film of the top door rail
- Replacing the waterproof film of the central door rail
3. Slowly roll up the old door guide film while heating it with a hair dryer.
4. Clean the contact surface of the door guide with a sponge dampened with alcohol.
Note: After cleaning, do not allow oil, grease and water to come into contact with the surface.
5. Stick the film on the door rail:
- 1. Unscrew the edge of the protective backing from the adhesive film.
- 2. Apply the film to the door guide.
- 3. Press the film against the door guide, gradually unwinding the protective backing from it. Make sure that the film lies parallel to the door guide.
- 4. Press the door guide film firmly with a plastic scraper (felt side).
Note: To avoid trapping air bubbles, slowly press the door guide film against the corners of the door frame.
6. If necessary, repeat the above operations.
7. Install all other removed parts.
8. Make sure that the body color areas in the door guide are covered with foil.
9. Check for water leakage. Do not pinch the end of the sleeve.