HondaBook.ru
Auto companies Volkswagen Auto companies Ford Auto companies Lada Auto companies Skoda Auto companies BMW Auto companies Mazda Auto companies Peugeot
English Русский
Български
Беларускі
Український
Српски
Hrvatski
Română
Polski
Slovenský
Magyar
Bookmark Contacts Sitemap   


Accord Civic Fit / Jazz CR-V HR-V Others Articles
Fit 1 (2001-2008)

Gearbox installation (Honda Fit 1)

  • Main
  • Honda Fit
  • 1 (2001-2008)
  • Transmission
  • Mechanical gearbox
  • Gearbox installation
0
1. Make sure the pins are installed in the clutch housing.

2. Apply grease to the clutch release fork (A); release bearing (B) and primary shaft (C) of the gearbox.

Note: The areas to be lubricated are indicated by hatching in the figure.
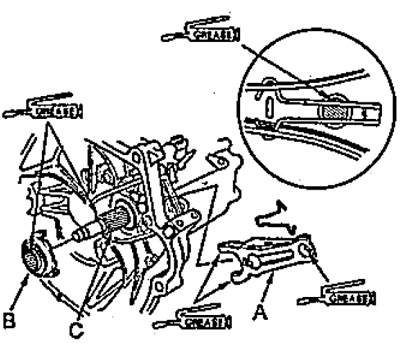

Note: The areas to be lubricated are indicated by…


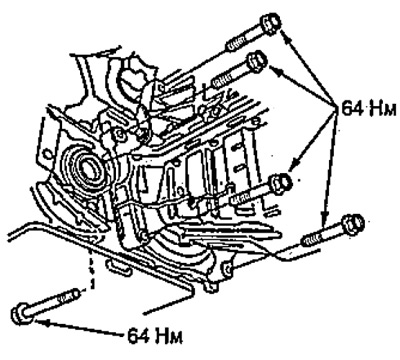
3. Place the gearbox on the jack and connect it to the engine.

4. Tighten the lower gearbox mounting bolts.
  • Tightening torque - 64 Nm

Tightening torque - 64 Nm


5. Lower the vehicle.

6. Install the transmission support bracket (A) and ground wire, then tighten the bolts.
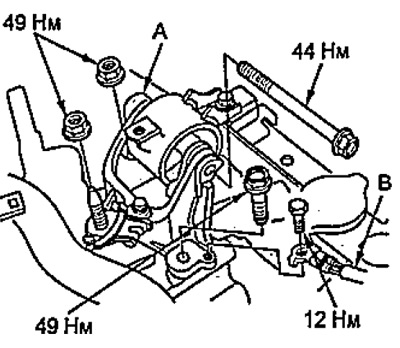
6. Install the transmission support bracket (A)…


7. Jack up the car.


8. Install the air filter bracket.
8. Install the air filter bracket.


9. Install the front engine mount.
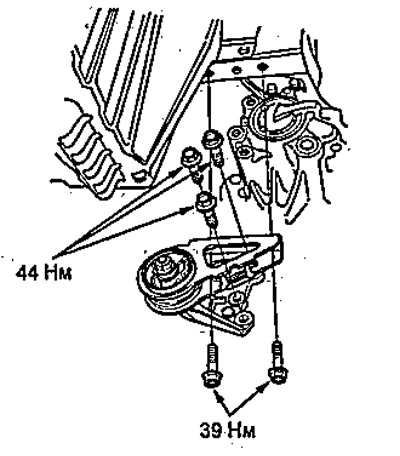
9. Install the front engine mount.


10. Install the support bracket (A) and the rear transmission support.
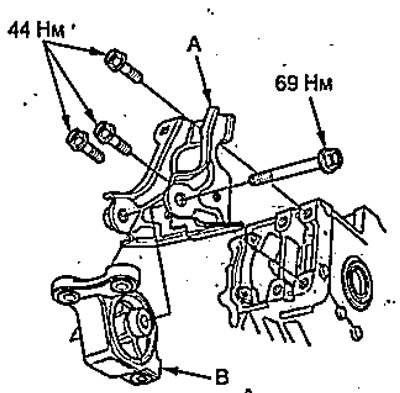
10. Install the support bracket (A) and the rear…


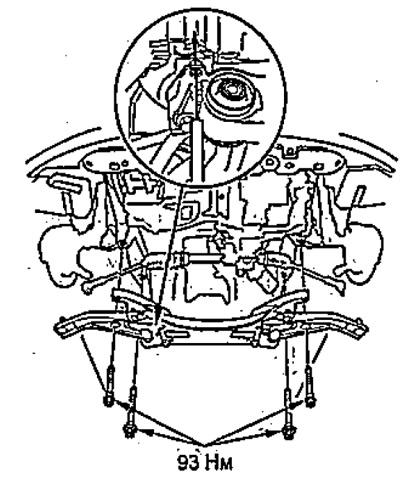
11. Jack up the front suspension beam.
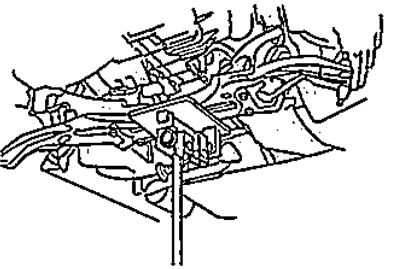
11. Jack up the front suspension beam.


12. Install the front suspension beam and tighten the bolts.


Note:
  • When installing, use a screwdriver to align the holes in the beam and the body.
  • Use only new bolts.


Use only new bolts.


13. Tighten the three bolts securing the rear gearbox support bracket.
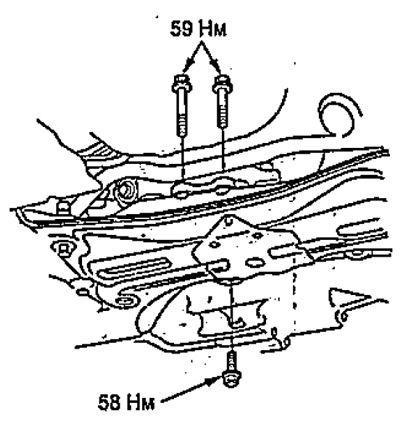
13. Tighten the three bolts securing the rear…


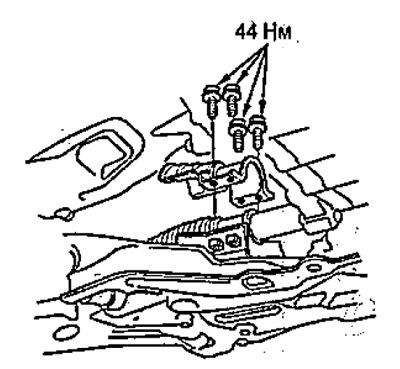
14. Install the steering gear mounting bracket.
  • Tightening torque - 44 Nm

Tightening torque - 44 Nm


15. Install the bracket (A) and the stiffener (B), then tighten the bolts.
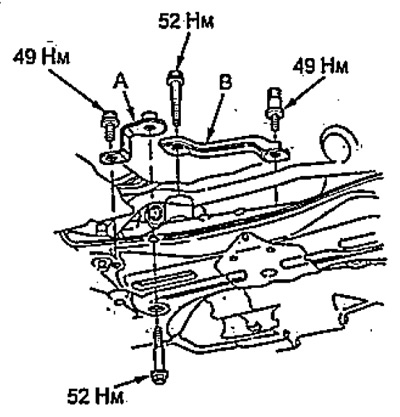


15. Install the bracket (A) and the stiffener…


16. Install the clutch protective cover.
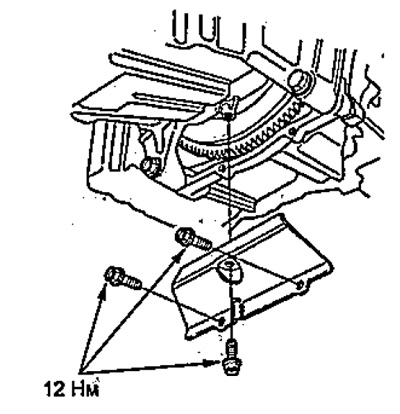
16. Install the clutch protective cover.


17. Install the drive shafts (see chapter "Drive shafts").

18. Install the dirt protection.
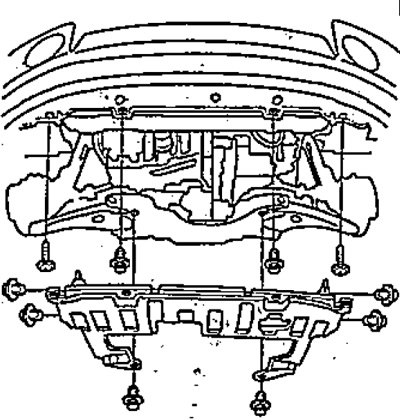
18. Install the dirt protection.


19. Fill the gearbox with oil (see chapter "Maintenance and general check and adjustment procedures").

20. Lower the vehicle.

21. Remove the special tools for hanging the engine.


22. Tighten the upper gearbox mounting bolt (A) and the lower starter bolt (B).
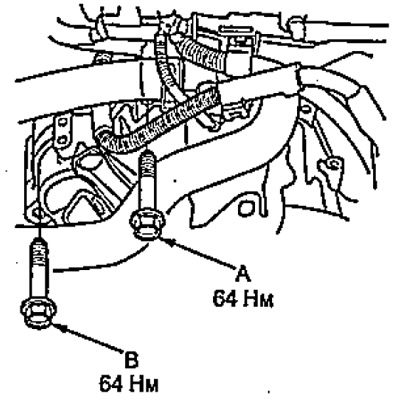
22. Tighten the upper gearbox mounting bolt (A)…


23. Connect the vehicle speed sensor connector.
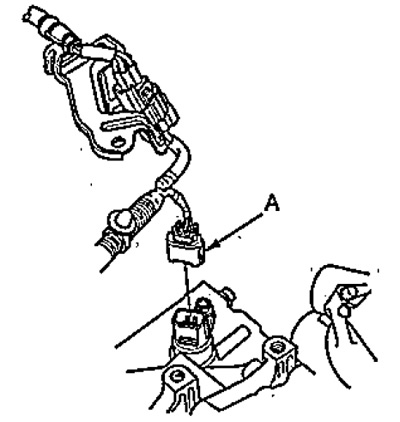
23. Connect the vehicle speed sensor connector.


24. Install the bracket (A) with the cables (B) and connect the cables to the gearbox. Install new cotter pins (C) as shown in the figure.
  • Tightening torque: 27 Nm.

Note: Make sure the cables are installed correctly - the marks (D) on the cables should be positioned as shown in the figure.
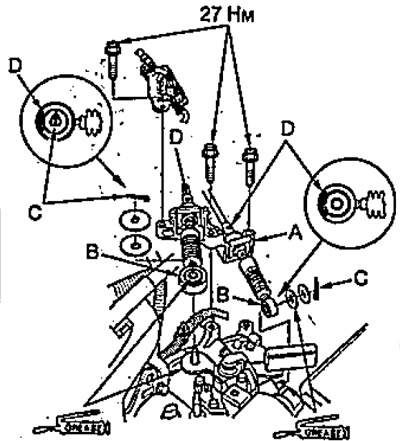

Note: Make sure the cables are installed…


25. Connect the connector (A) of the reversing light switch and install the wire clamps (B).
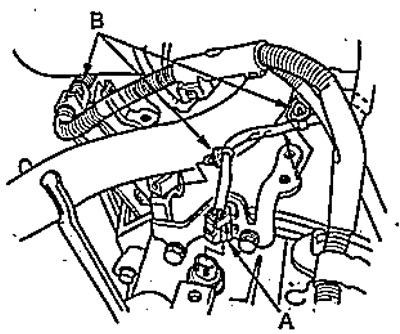


25. Connect the connector (A) of the reversing…


26. Install the cover (A).

26. Install the cover (A).


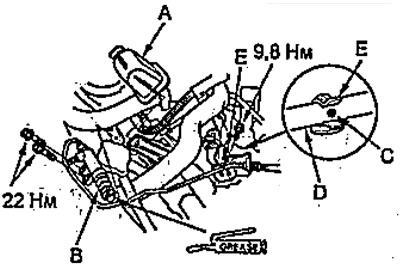
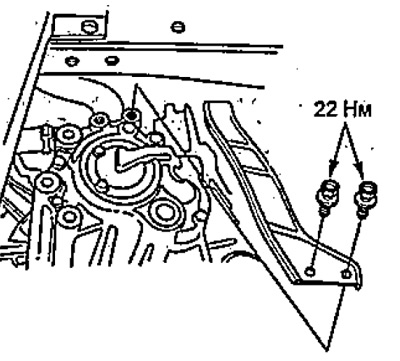
27. Apply high-temperature grease to the clutch release slave cylinder rod. Install the clutch release slave cylinder (B).
  • Tightening torque - 22 Nm

28. Install the tube (D) into the retainer (E) according to the mark (C).

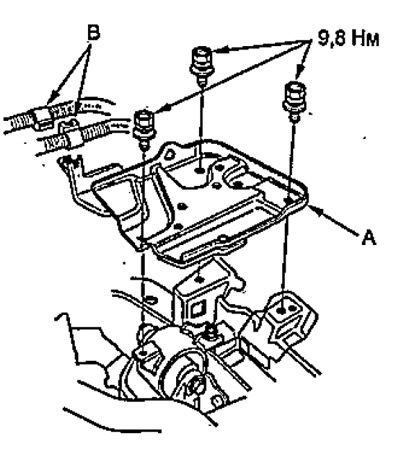
29. Install the battery tray (A) and wire clamps (B).
  • Tightening torque - 22 Nm

Tightening torque - 22 Nm


30. Install the air filter housing (see chapter "Maintenance and general check and adjustment procedures").

31. Install the battery.

32. Check and, if necessary, adjust the front wheel alignment angles (see chapter "Suspension").

33. Check the correct operation of the clutch.

34. Check the correct operation of the gearbox, make sure that gear shifting is smooth and that there is no extraneous noise.

(The original is located on the website: «HondaBook.ru»)
This article is available at: russian, bulgarian, belarusian, ukrainian, serbian, croatian, romanian, polish, slovak, hungarian
This information has been verified: Varvara Vereshchagina
Share with friends:
◀ Previous
Fit 1: Mechanical gearbox
Next ▶

Removal the gearbox
Gear Selection and Shifting Mechanism — Removal and Installation
Checking the Reverse Light Switch
Checking the oil level and changing it
Gearbox — device
Gearbox shafts — device
See also other articles from Honda manuals:
Gearbox — Accord 1990-91 Honda Accord 3 (1985-1989)
Gearbox support — inspection and replacement Honda Civic 3 and 4 (1983-1991)
Rear Axle Gearbox Oil (CR-V 4WD models only) Honda CR-V 1 (1995-2001, petrol)
Removal the gearbox Honda HR-V 1 (1998-2006, petrol)
Link in different formats to this article
Comments and feedback from visitors
No comments yet


How much will 10 + 48 ?


Fit 1 (2001-2008) 
  • General information
  • User manual
  • Maintenance
  • Power unit
  • Engine repair
  • Cooling and lubrication system
  • Injection and power system
  • Control system
  • Engine electrical equipment
  • Transmission
  • Clutch
  • Mechanical gearbox
  • Automatic gearbox
  • Variator (CVT)
  • Drive shafts and gearbox
  • Chassis and running gear
  • Car suspension
  • Steering
  • Brake system
  • Body and interior
  • Exterior (external elements)
  • Interior (internal elements)
  • Doors, locks and windows
  • Heater and air conditioner
  • Safety system
  • Electrical equipment
  • Equipment and devices
  • Wiring diagrams (since 06.2001)
  • Wiring diagrams (since 06.2004)
HondaBook.ru © 2018–2026 • Mobile version • Sitemap: EN BG BY UA RS HR RO PL SK HU • Feedback • Driver Information • Search system • Bookmark
Accord 3 (1985-1989) • Accord 6 (1997-2002) • Civic 3 and 4 (1983-1991) • Civic 5 and 6 (1991-2000) • Civic 6 (1995-2000) • Civic 7 (2000-2005) • Civic 8 (2005-2011) • Fit 1 (2001-2008) • CR-V 1 (1995-2001) • CR-V 2 (2002-2006) • HR-V 1 (1998-2006) • Avancier 1 (1999-2003) •
 
This website uses cookies to ensure proper functioning. By clicking "OK," you agree.