
Note:
- Installation is made in an order, the return to removal.
- When installing a new evaporator, fill it with a small amount of compressor oil.
- When installing, make sure the evaporator plate is on the correct side.
- When installing, make sure that no dirt or dust has entered the evaporator tubes.
- When installing, replace the O-rings with new ones. Use O-rings suitable for HFG-134a refrigerant (R-134a).
- Apply SP-10 compressor oil to the O-rings when installing.
- Do not allow compressor oil to come into contact with vehicle parts. In case of contact, it must be removed immediately with a detergent and wiped dry.
- After installing the metal dinners, carefully insert the tubes until they are fully seated.
- After installation, charge the system with refrigerant.
1. Remove the refrigerant from the system.
2. Cut off the plastic clips from the evaporator tubes. Remove dirt with compressed air or detergents. Remove the metal rims, disconnect the inlet and outlet tubes. Remove the o-rings from the tubes. Wipe the inner walls of the tubes with a brush and SP-10 compressor oil (after disconnecting the pipes, do not use compressed air or detergents). Immediately after disconnecting the pipes, they must be tightly closed to prevent dirt from entering the system.
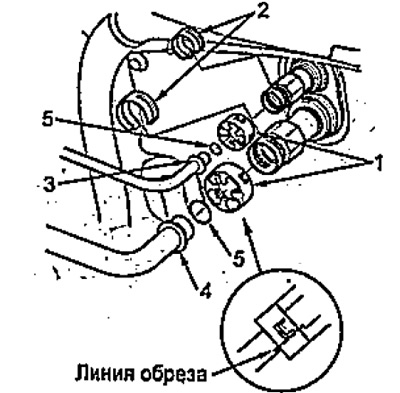
1 - plastic retainer,
2 - metal rim,
3 - inlet tube,
4 - exhaust pipe,
5 - sealing ring.
3. Remove the heater fan assembly.
4. Turn away screws and remove a cover of tubes of the evaporator. Unscrew the two bolts and remove the refrigerant supply and intake pipes, remove the expansion valve and o-rings.
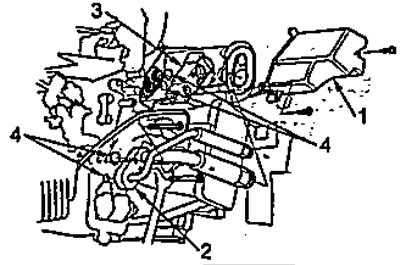
1 - evaporator tube cover,
2 - refrigerant supply and intake pipes,
3 - expansion valve,
4 - sealing rings.
5. Disconnect the temperature sensor connector behind the evaporator, remove the connector holder. Loosen the screws and remove the air duct.
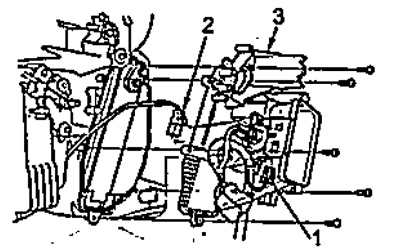
1 - temperature sensor connector behind the evaporator,
2 - detachable latch,
3 - air duct.
6. Remove the evaporator assembly with plate.
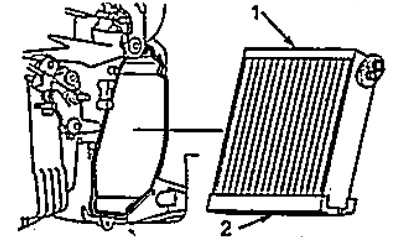
1 - evaporator,
2 - evaporator plate.