


Contents: Electrical diagram ⇊ Replacing the upper brake light bulb ⇊ Checking the brake fault sensor ⇊
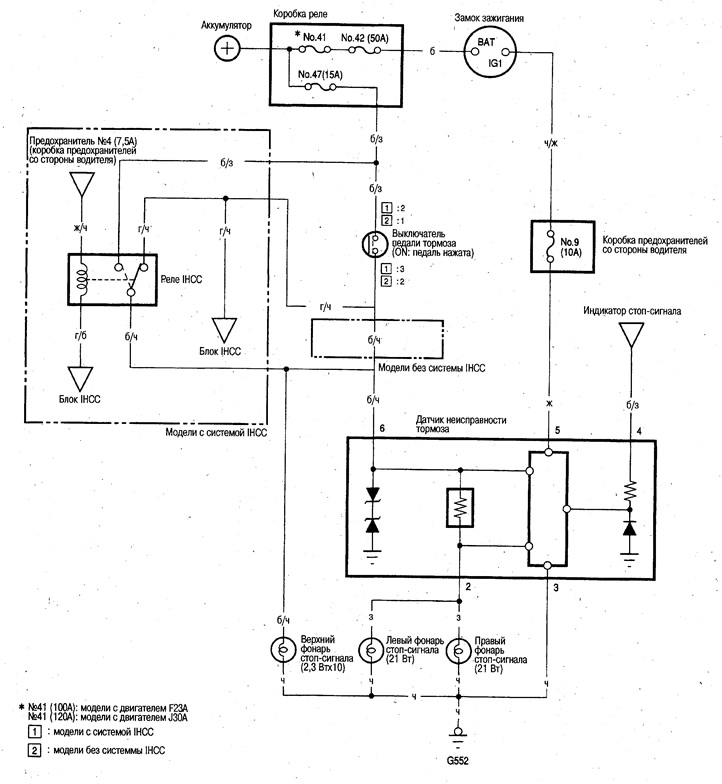
Electrical diagram
Replacing the upper brake light bulb
1. Open the back door.
2. Remove the rear door lower trim (see chapter Body).
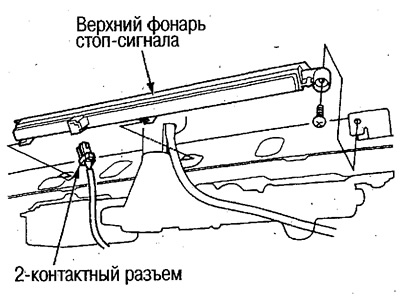
3. Disconnect the 2-pin connector from the high brake light.
4. Remove the screw from the upper brake light and remove the light from the rear door.
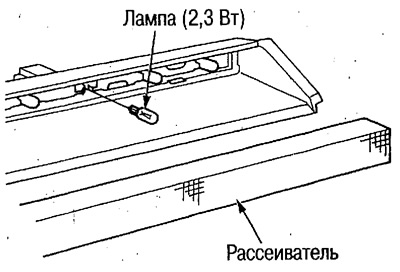
5. Remove the diffuser and replace the lamp.
Checking the brake fault sensor
1. Make sure the brake lights come on.
If all brake lights do not come on, perform a brake light system check (see above).
If one of the lights does not light, check the bulb, if the bulb is working, proceed to the next test.
2. Remove the luggage compartment side trim.
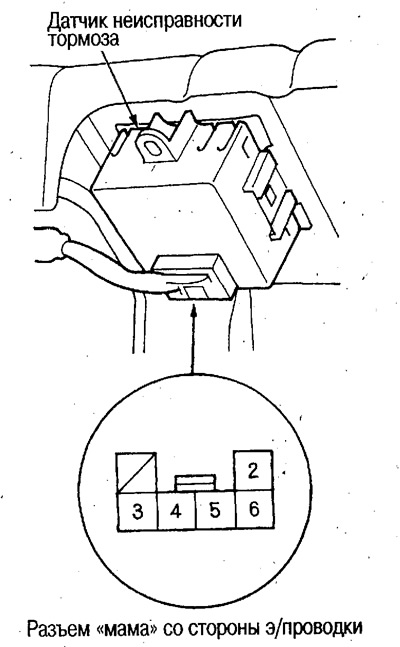
3. Short contact No.4 of the sensor to ground. Make sure that after turning the ignition key from the OFF position to the ON (II) position, the BRAKE LAMP indicator lights up briefly and then goes out.
If the indicator does not go out, there is a break in the white-green wire or the brake light indicator circuits or printed circuit board are faulty.
If the indicator goes out, proceed to the next test.
4. Close contact No.3 of the sensor to ground and press the brake pedal. Make sure that when switching the ignition key from the OFF position to the ON (II) position, the BRAKE LAMP indicator lights up briefly and then goes out.
If the indicator does not go out, replace the sensor and check the operation of the brake lights and brake light indicator.
If the indicator goes out, there is no ground (G552) or there is a break in the black wire.
[Article source on the website: hondabook.ru]