
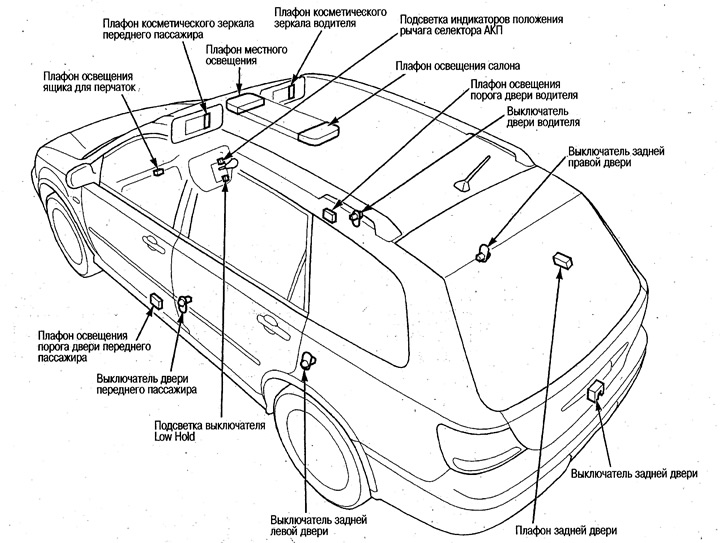
Location of components
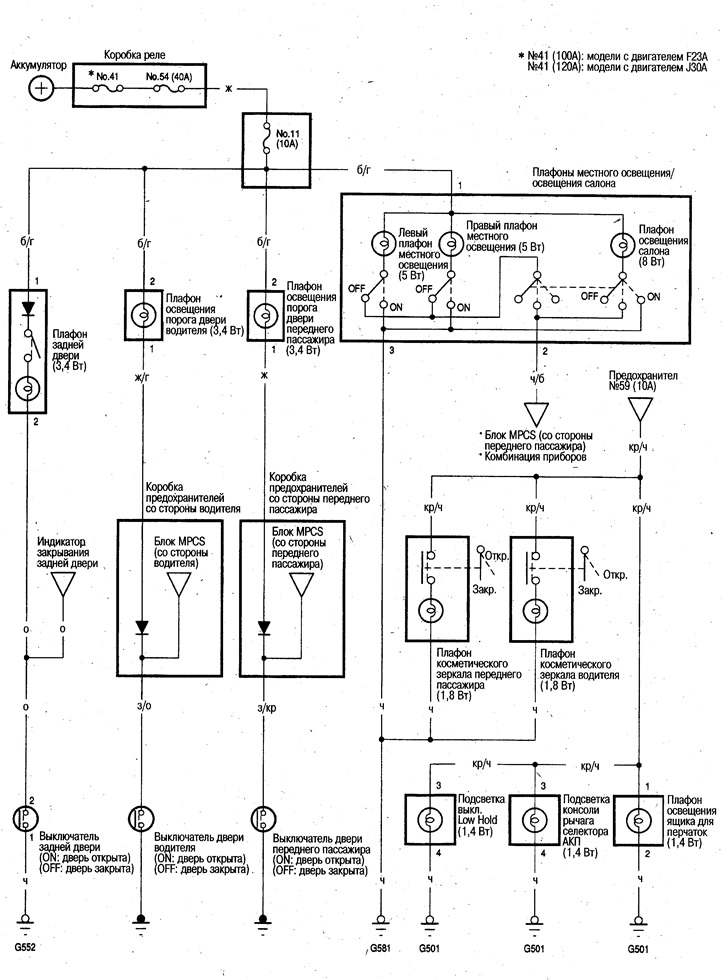
Wiring diagram
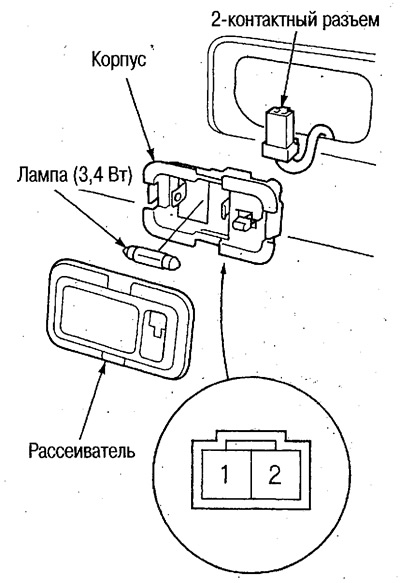
Check of a plafond of local lighting / interior lighting
1. Turn the ignition key to the OFF position and remove the diffusers.
2. Remove ceiling console assembly (see ch. Body).
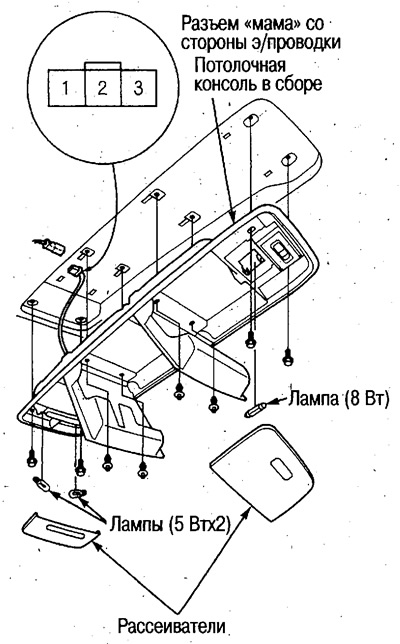
3. Disconnect the 3-pin connector.
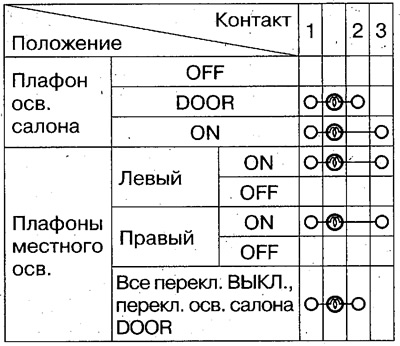
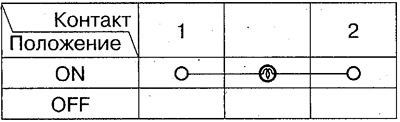
4. Check the continuity between the various contacts in each switch position and verify that there is continuity only between the contacts connected by the lines in the table.
Glove box/sill light bulb replacement
Glove box light
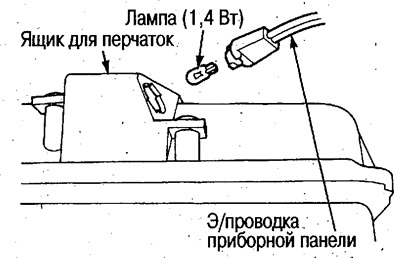
1. Remove the glove box (see ch. Body).
2. Disconnect a lamp from e/conductings of the instrument panel.
Door sill light
1. Remove diffuser.
2. Remove the bulb from the socket.
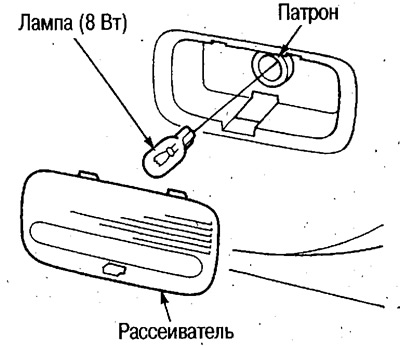
Rear door light check
1. Turn the ignition key to the OFF position and remove the diffuser.
2. Press the latch, remove the housing, disconnect the 2-pin connector and remove the dome.
3. Check the continuity between the contacts at each switch position and make sure that there is continuity only between the contacts connected by a line in the figure.
 |  |
Replacing the lamps of the plafonds of cosmetic mirrors
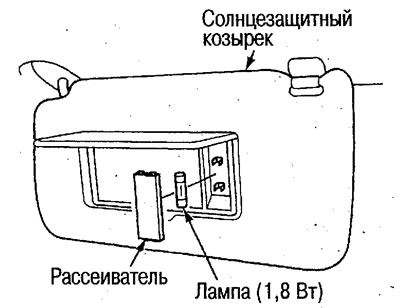
1. Lower the sun visor.
2. Remove diffuser and replace lamp.
Replacing the backlight lamp of the console of the selector lever / LOW HOLD switch
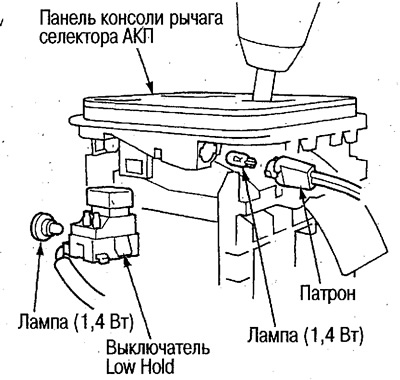
1. Remove the center panel (see ch. Body).
2. Remove the automatic transmission selector lever assembly (see ch. Automatic transmission).
3. Remove the console panel selector lever AT.
Illuminated selector lever console
4. Turn the cartridge counterclockwise and remove it from the console panel of the selector lever of the automatic transmission.
5. Remove the bulb from the socket.
Illuminated switch LOW HOLD
4. Remove the Low Hold switch from the selector lever console panel.
5. Remove the lamp.
Checking the rear door lock switch
1. Open the back door.
2. Remove the bottom furnish of a back door.
3. Disconnect the rear door lock switch 2-pin connector.
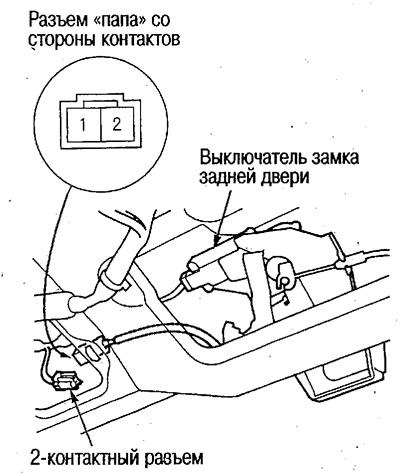
4. Check the continuity between the contacts at each switch position and make sure that there is continuity only between the contacts connected by a line in the figure.
