
HondaBook.ru
Auto companies Volkswagen Auto companies Ford Auto companies Lada Auto companies Skoda Auto companies BMW Auto companies Mazda Auto companies Peugeot
English Русский
Български
Беларускі
Український
Српски
Hrvatski
Română
Polski
Slovenský
Magyar
Bookmark Contacts Sitemap   


Accord Civic Fit / Jazz CR-V HR-V Others Articles
Fit 1 (2001-2008)

Removal and installation the spiral wire (Honda Fit 1)

  • Main
  • Honda Fit
  • 1 (2001-2008)
  • Body and interior
  • Safety system
  • Removal and installation the spiral wire
0
Note: Be careful not to damage the wire harness during assembly.


1. Place the vehicle in a straight-ahead position.

2. Disconnect the negative battery terminal and wait 3 minutes.

3. Remove the driver's airbag.

4. Disconnect the coil wire connector and remove the steering wheel bolt.
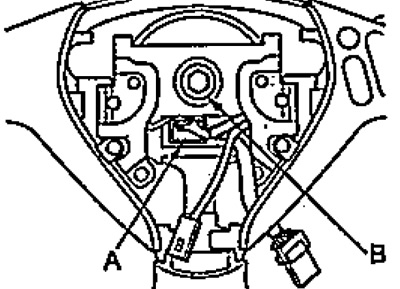
4. Disconnect the coil wire connector and remove…


5. Make sure the vehicle is in a straight-ahead position and remove the steering wheel cover.

6. Remove the steering wheel.

7. Loosen the screws and remove the upper and lower steering column covers.
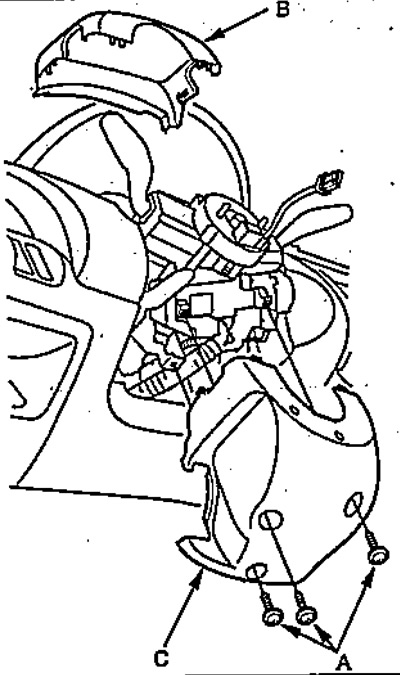
7. Loosen the screws and remove the upper and…


8. Disconnect the two instrument cluster wire harnesses from the coil wire.
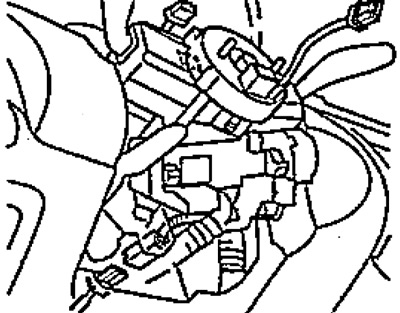
8. Disconnect the two instrument cluster wire…


9. Bend the retainer with a rectangular tool as shown in the figure and remove the spiral wire.
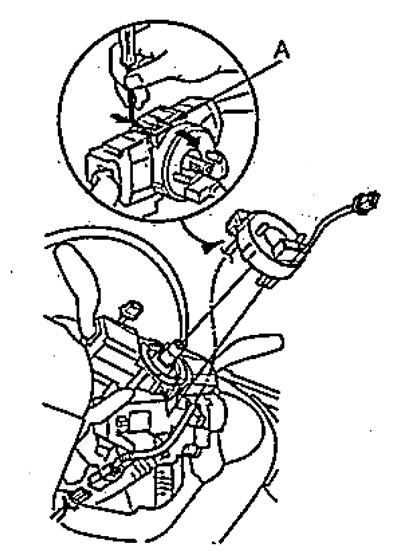


9. Bend the retainer with a rectangular tool as…


10. Before installing the spiral wire, place the vehicle in a straight-ahead position.

11. Disconnect the negative battery terminal and wait 3 minutes.

12. Set the turn signal switch to the position where the projections are vertical as shown in the figure.
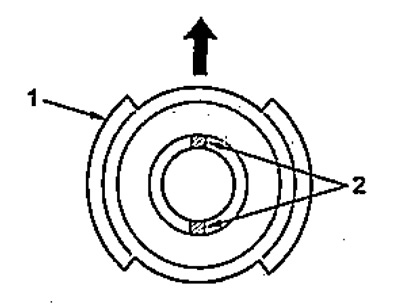
Direction indicator switch.

Direction indicator switch.
1 - direction indicator switch,
2 - protrusions.


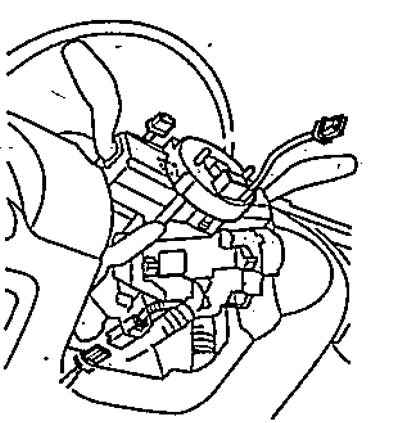
13. Install the coil wire onto the steering column shaft and connect the coil wire connectors.
13. Install the coil wire onto the steering…


14. Install the steering column pads.


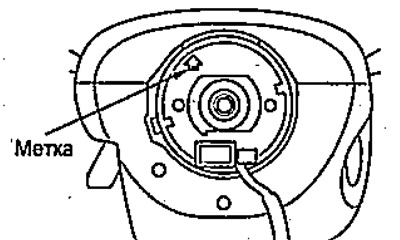
15. If necessary, centralize the spiral wire. First, turn the spiral wire clockwise until it stops, then turn it counterclockwise about three turns so that the mark is directed vertically upward.
15. If necessary, centralize the spiral wire.…


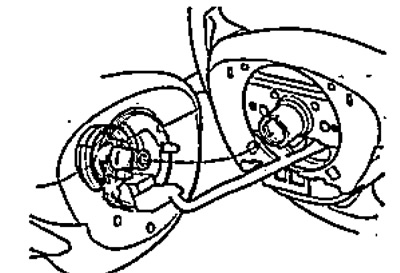
16. Make sure the turn signal pins are aligned with the protrusions as shown in the figure and install the steering wheel.
16. Make sure the turn signal pins are aligned…


17. Tighten the steering wheel bolt and connect the connectors.
  • Tightening torque - 39 Nm

18. Install the driver's airbag.

19. Connect the negative battery terminal.

20. After installing the spiral wire, follow these steps:
  • turn the ignition switch to the "ON" position and check that the SRS indicator comes on for approximately six seconds and goes out;
  • turn the steering wheel all the way to either side and make sure the SRS indicator does not come on;
  • make sure the horn is working;
  • make sure the cruise control button works;
  • make sure the turn signals are working.
This article is available at: russian, bulgarian, belarusian, ukrainian, serbian, croatian, romanian, polish, slovak, hungarian
This information has been verified: Varvara Vereshchagina
Share with friends:
◀ Previous
Fit 1: Safety system
Next ▶

Removal and installation curtain airbags (left-hand drive models only)
Removal and installation side airbags
Removal and installation the passenger airbag
Removal and installation the driver's airbag
Location of security system components
Removal and installation the SRS control unit
Removal and installation the side SRS sensor
Removal and installation the passenger weight sensor (left-hand drive models)
Removal and installation the passenger presence control unit
Removal and installation front SRS sensors
See also other articles from Honda manuals:
Spiral wire Honda Civic 7 (2000-2005)
Link in different formats to this article
Comments and feedback from visitors
No comments yet


How much will 22 + 18 ?


Fit 1 (2001-2008) 
  • General information
  • User manual
  • Maintenance
  • Power unit
  • Engine repair
  • Cooling and lubrication system
  • Injection and power system
  • Control system
  • Engine electrical equipment
  • Transmission
  • Clutch
  • Mechanical gearbox
  • Automatic gearbox
  • Variator (CVT)
  • Drive shafts and gearbox
  • Chassis and running gear
  • Car suspension
  • Steering
  • Brake system
  • Body and interior
  • Exterior (external elements)
  • Interior (internal elements)
  • Doors, locks and windows
  • Heater and air conditioner
  • Safety system
  • Electrical equipment
  • Equipment and devices
  • Wiring diagrams (since 06.2001)
  • Wiring diagrams (since 06.2004)
HondaBook.ru © 2018–2026 • Mobile version • Sitemap: EN BG BY UA RS HR RO PL SK HU • Feedback • Driver Information • Search system • Bookmark
Accord 3 (1985-1989) • Accord 6 (1997-2002) • Civic 3 and 4 (1983-1991) • Civic 5 and 6 (1991-2000) • Civic 6 (1995-2000) • Civic 7 (2000-2005) • Civic 8 (2005-2011) • Fit 1 (2001-2008) • CR-V 1 (1995-2001) • CR-V 2 (2002-2006) • HR-V 1 (1998-2006) • Avancier 1 (1999-2003) •
 
This website uses cookies to ensure proper functioning. By clicking "OK," you agree.