
Removable Components
Before removing the glass, remove the following components:
- Rear door lower trim (see above).
- Side door finishes (see above).
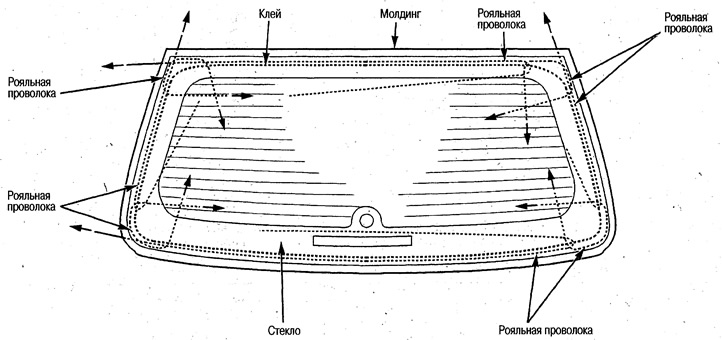
Piano wire installation method
Pass the piano wire at each corner as shown in the figure, pull the wire in the directions of the arrows and cut the adhesive.
The figure shows the view from the outside.
If the tailgate molding is severely damaged, replace it.
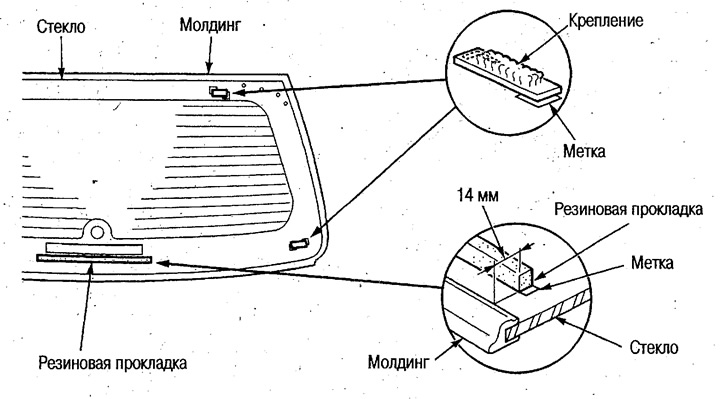
Areas for installing rubber gaskets and fasteners
The installation of rubber gaskets and fasteners is carried out according to the alignment marks on the glass.
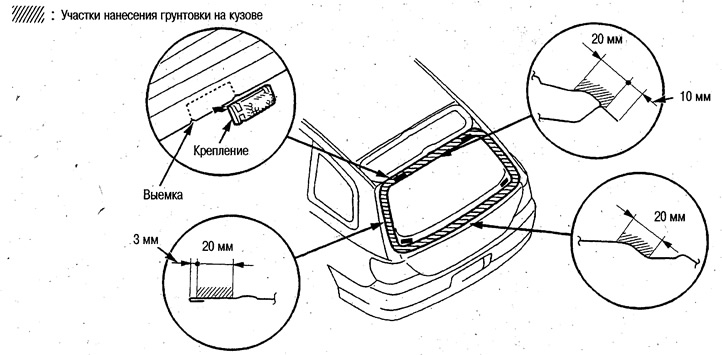
Fastening/priming areas on the body
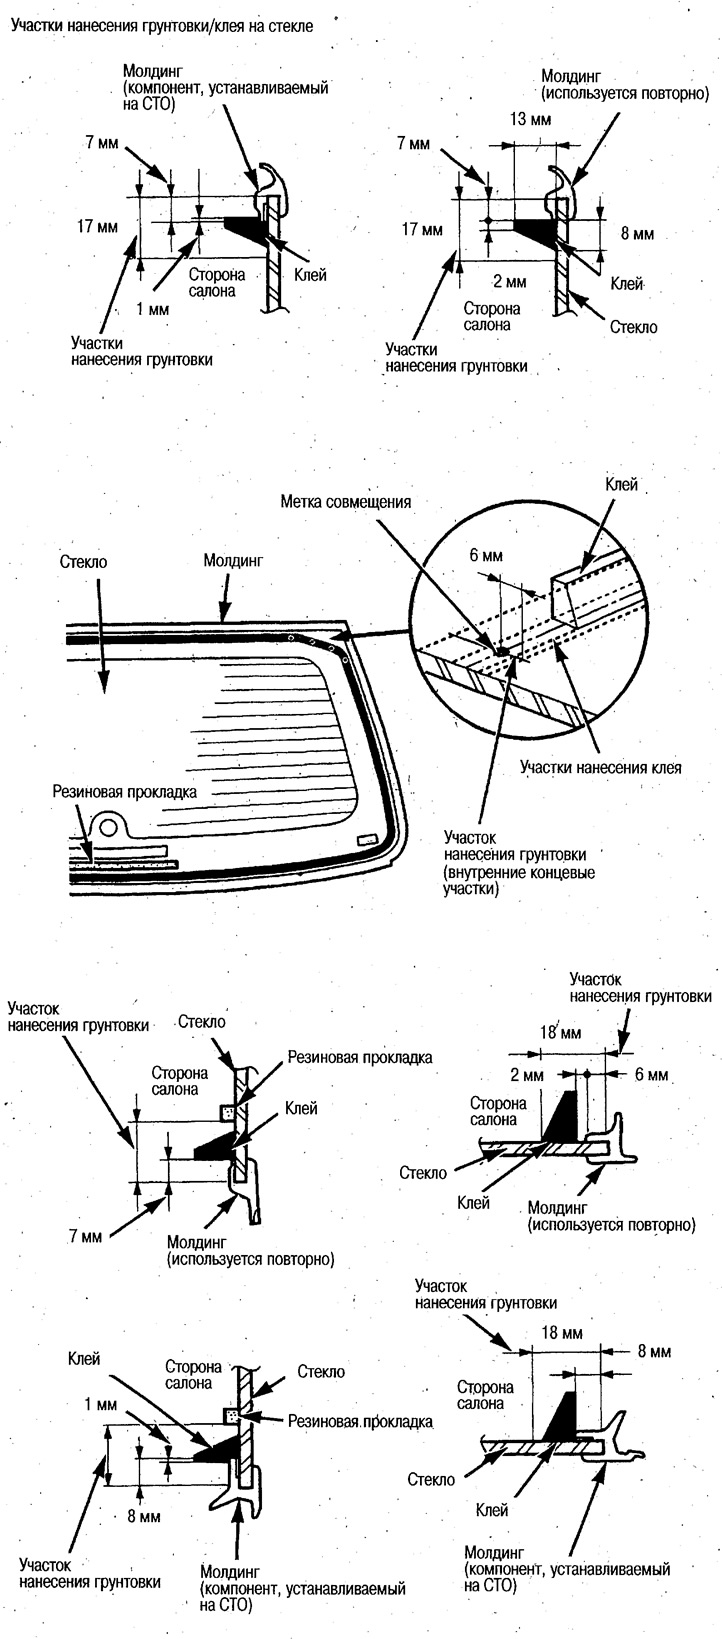
Primer/Adhesive Areas on Glass
Rear Door Molding Replacement
1. Remove rear door glass (see above).
2. Place the glass with the seal up and cut off the part of the molding shown in the figure with a knife.
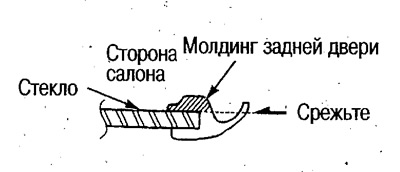
Do the work with an assistant.
3. After removing the molding, clean the glass around the entire perimeter with clean gasoline or alcohol.
Make sure that dust, oils, water, etc. do not get on the glass after cleaning. If they do get on the glass, clean again.
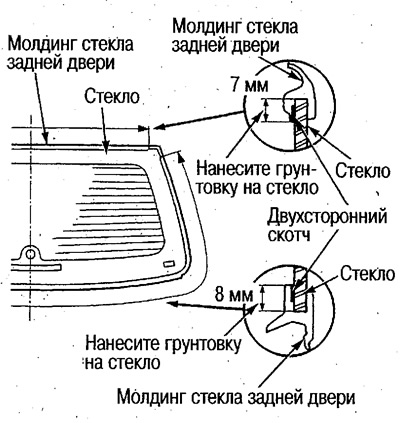
4. Apply primer 3MN-200 or equivalent to the molding installation areas on the inside of the glass.
Do not touch the surface of the primer with your hands.
Make sure that dust, oils, water, etc. do not get on the surface of the primer. If they do get on the glass, clean again.
5. Install the molding on the glass, starting from the top corner.
Make sure there are no waves or gaps.
6. Remove the paper from the molding's adhesive tape and stick the molding to the glass.
Make sure there are no waves or gaps.