
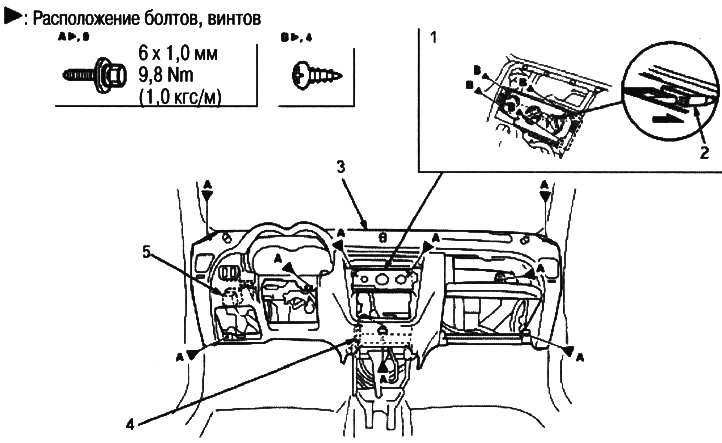
1. heater control panel; 2. heater; 3. dashboard; 4. cup holder lighting connector; 5. instrument harness connector
This area contains components of an additional security system with an airbag (SRS). Review the SRS component locations, precautions, and procedures before attempting any repair or service.
Note:
- When prying out components with a flat-bladed screwdriver, wrap it with protective tape to prevent damage, and apply the tape to adjacent components.
- When removing and installing the dashboard, it is good to have an assistant.
- Do not scratch the dashboard and adjacent components.
- Wear protective gloves.
- The illustration shows a left-hand drive model; the location on the right-hand drive model is symmetrical.
1. Remove:
- Front/rear console (see above).
- Dashboard center section (see above).
- Glove box (see above).
- Driver side pocket (see above).
- A-pillar trim (see above).
- steering column.
- Front passenger airbag.
2. Loosen the screw, then push the heater control panel through the heater hole.
3. Disconnect the gauge harness connector and the cupholder lighting connector.
4. Remove the bolts, then carefully remove the instrument panel through the door opening (top right picture).
5. Installation is carried out in the reverse order of removal, taking into account the following:
- Make sure the dashboard is properly seated on the guide pins.
- Before tightening the bolts, make sure that the instrument panel wiring harnesses are not pinched.
- Connect the connectors and antenna wire securely.