
Attention.
- Do not cut your hands while working, wear gloves.
- Be careful not to damage the instrument panel and the components to be removed.
Do the work with an assistant.
While working with a screwdriver, protect the components with protective tape or a cloth. Also/ Wrap the screwdriver with tape so as not to damage the components.
Disconnect the battery cables and wait more than 3 minutes. before starting work.
1. Remove the following components:
steering column (see ch. Steering).
central panel (see above).
audio system unit, (see ch. Additional passive safety system (SRS)).
Automatic transmission control cable (see ch. Automatic transmission).
Glove box (see above).
Deflector on the passenger side.
Finishing the front pillars.
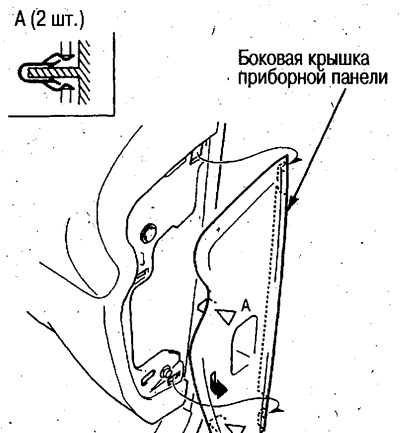
2. Remove the dashboard side cover on the driver's side.
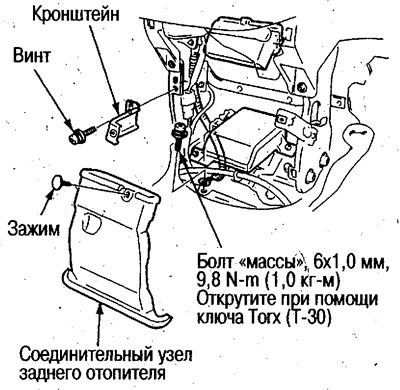
3. Remove the rear heater connector and unscrew the bolt «masses».
4. Remove the bracket from the left side of the center frame.
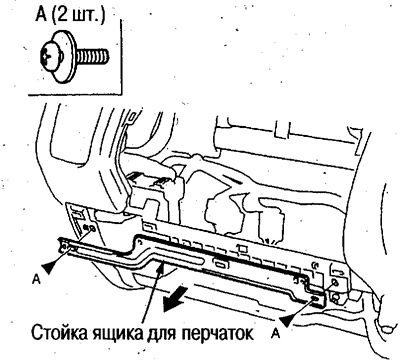
5. Remove the glove box post.
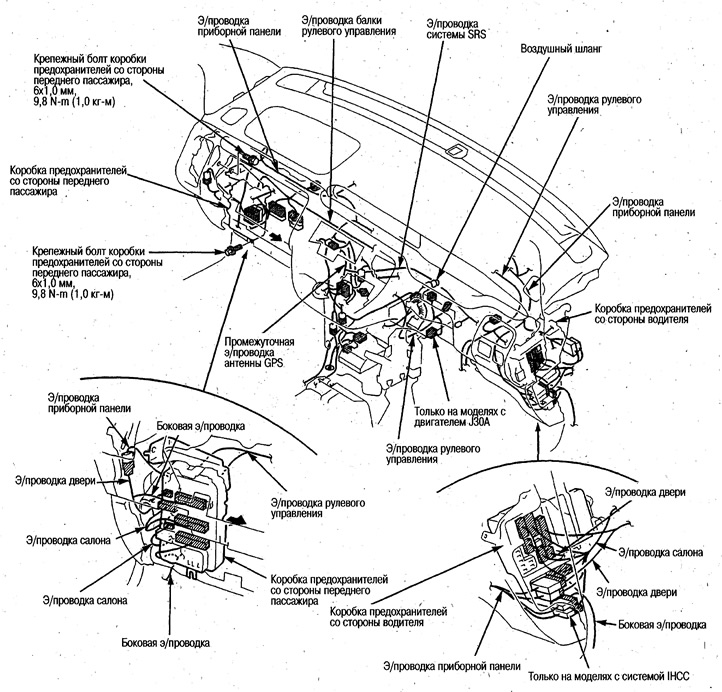
6. Disconnect the connectors and air hose shaded in the illustration below.
7. Remove clips e / wiring and connectors (in the required places).
Before removing e / wiring from the dashboard, remember the installation locations of the e / wiring clips and connectors.
8. Turn off a fixing bolt of a box of safety locks from outside the forward passenger and remove a box.
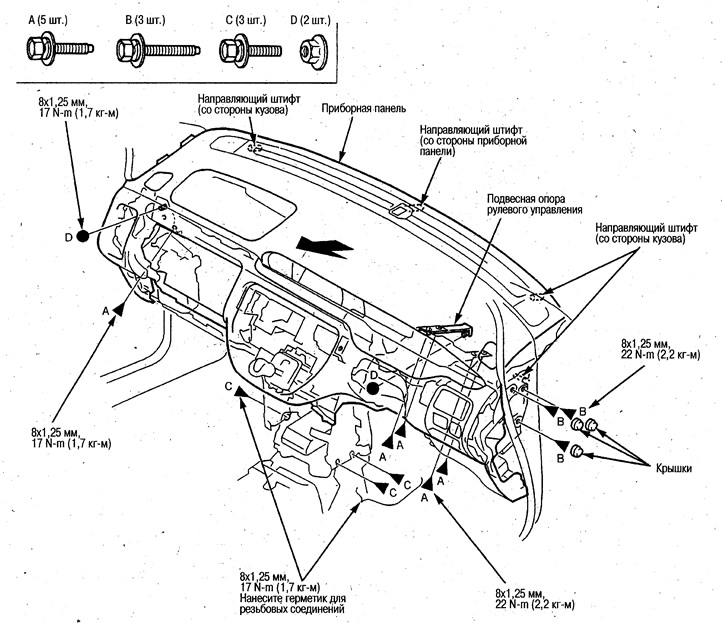
9. Turn off bolts and nuts, raise a dashboard a little, pull on itself and remove it.
Attention.
- Do not drop the dashboard.
- Protect mating components from damage with a cloth.
10. Install in the reverse order of removal.
Make sure the dashboard is properly seated on the guide pins.
Before tightening the bolts From the center frame, apply thread sealant to the bolts.
Before fixing the dashboard, make sure that the electrical wiring is not clamped.
Connect connectors securely.