Attention:
- Work in a dust-free area.
- in winter (at low temperature) warm the guides and tapes with a hair dryer.
- Guide temperature: approx. 15°С
- Tape temperature: approx. 30°С
- To prevent the tape from deforming during heating, do not heat one part of the tape abruptly.
- To avoid air bubbles and wrinkles, start gluing the tape from the corner.
- If air bubbles form, prick them with a needle and remove the air with your finger or a rubber roller.
- If bubbles larger than 10 mm appear, stick the tape again.
1. Prepare the following items.
- plastic roller
- Pure gasoline or alcohol
- Textile
- hair dryer
- pin
2. Remove the following items.
front doors
When replacing the top guide outer band:
- Exterior rearview mirror trim (see below).
- door trim (see above).
- Outside rear view mirror (see below).
- Window opening gutter (necessary part) (see above).
- rail trim (necessary part) (see above).
When replacing the inner top guide tape:
- Exterior rearview mirror trim (see below).
- door seal (see above).
- Window opening gutter (necessary part) (see above).
When replacing the inner tape of the center guide:
- Exterior rearview mirror trim (see below).
- door trim (necessary part) (see above).
- door seal (necessary part) (see above).
- Window opening gutter (necessary part) (see above).
Rear side doors
When replacing the top guide outer band:
- door trim (see above).
- plastic film (see above).
- Glass (see above).
- door molding (see above).
- External finishing of the additional section (see above).
- Window opening gutter (necessary part) (see above).
- rail trim (necessary part) (see above).
- Additional seal (necessary part).
When replacing the inner tape of the top and center guide:
- door trim (see above).
- plastic film (see above).
- Glass (see above).
- door molding (see above).
- External finishing of the additional section (see above).
- Window opening gutter (necessary part) (see above).
- door seal (see above).
3. Remove the old guide tape by heating it with a hair dryer.
4. Moisten a cloth with clean benzine or alcohol and thoroughly degrease the adhesive area of the guide tape.
- If there is hardened adhesive on the surface to be bonded, moisten it liberally with clean gasoline or alcohol, rub it with your finger and remove.
- Avoid contamination of the bonded surface after degreasing.
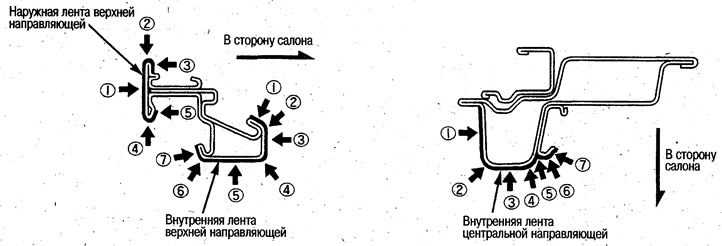
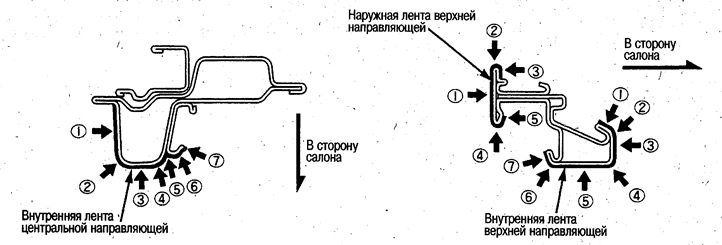
5. Apply the guide tape.
1) Slightly peel off the backing paper at the end of the tape.
2) Attach the tape to the guide.
3) Keeping the tape and guide parallel, peel off the backing paper little by little and stick the tape to the guide.
4) Press the tape against the door guide with a roller.
Attention.
- Do not stick the tape all at once.
- Start pressing from the corner so that air bubbles do not form.
6. Replace the rest of the tapes in the order specified in step 5.
7. Install the removed components.
Make sure that the painted surface of the body is not visible through the door rail.
8. Check the door for water leaks.
Pinch the end of the hose and pour water.
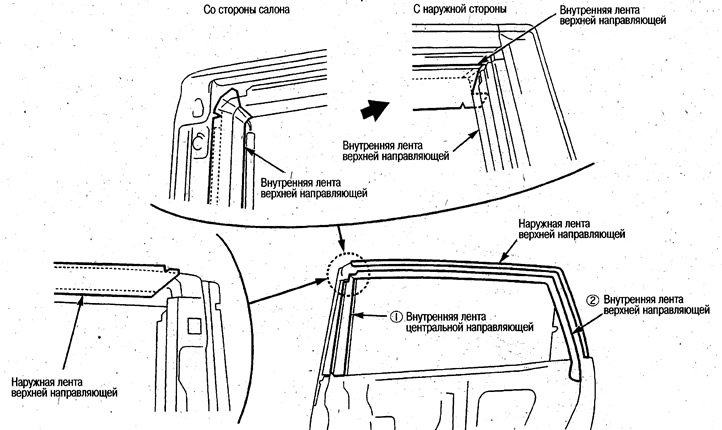
Front doors
Attach the inner tapes in the order shown in the illustration.
Press the bands in the order shown in the illustration.
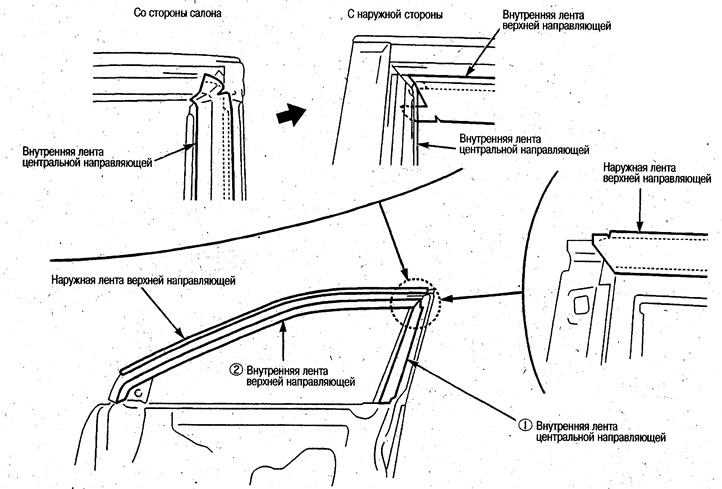
Rear side doors
Press the bands in the order shown in the illustration.
Attach the inner tapes in the order shown in the illustration.