
Attention.
- Do not stain or damage components.
- Work with gloves.
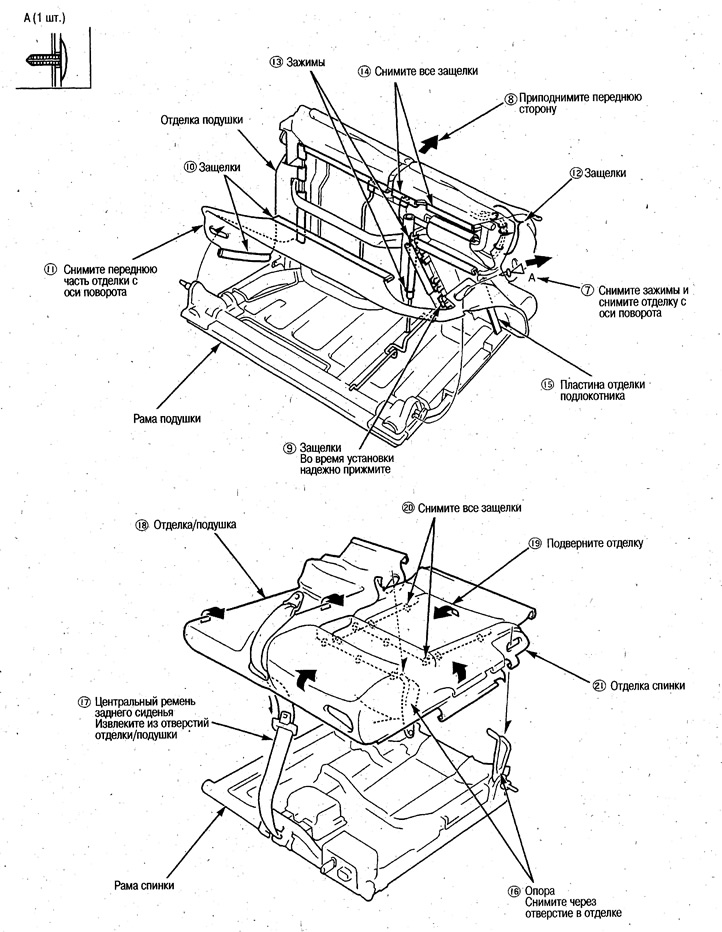
Seat cushion

Remove cushion and armrest (see above).
Remove the components in the order shown in the illustration.
The illustration shows the right sliding seat cushion. Replacing the trim of the left cushion is carried out in the same way. Replacing the trim of the non-sliding seat cushion is also carried out in the same way, with the exception of clause 7-clause 16.
Install in the reverse order of removal.
- Check the latches for damage and replace them if necessary.
- Correctly install clips and latches and make sure that the seams do not open on the finish, wrinkles do not form.
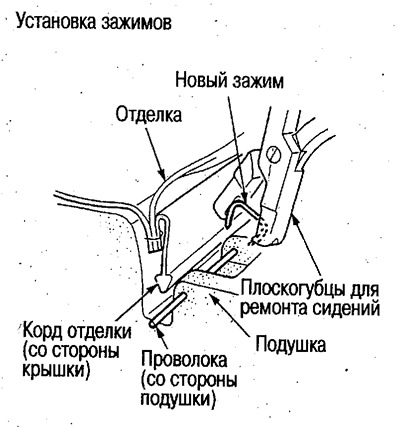
- Replace latches with new ones. If using seat repair pliers (available for sale), work will be easier (see below).
- Before installing the center seat belt guide, make sure the belt is not twisted.
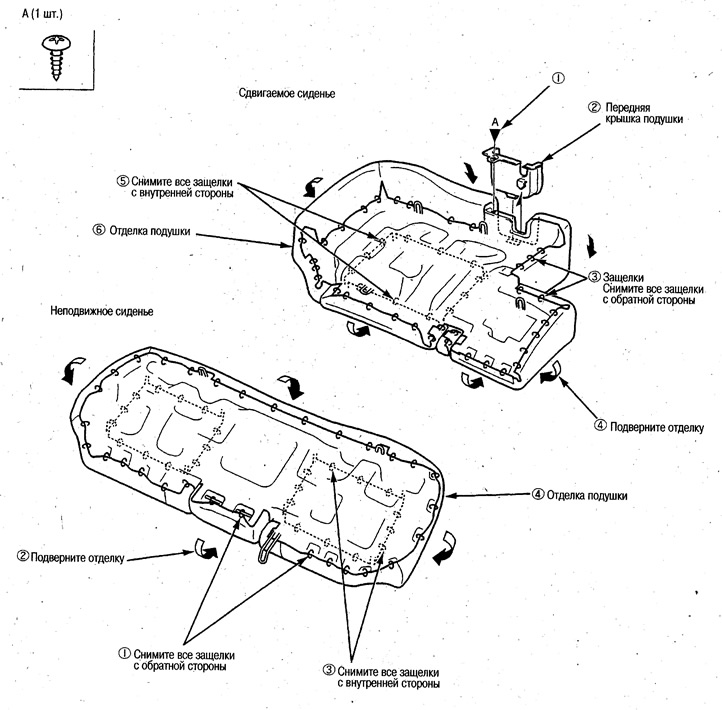
Sliding seat
Seat cushion
Remove the seat cushion (see above) and remove the components in the order shown in the figure.
Install in the reverse order of removal.
- Check the latches for damage and replace them if necessary.
- Correctly install clips and latches and make sure that the seams do not open on the finish, wrinkles do not form.
- Replace latches with new ones. If using seat repair pliers (available for sale), work will be easier.
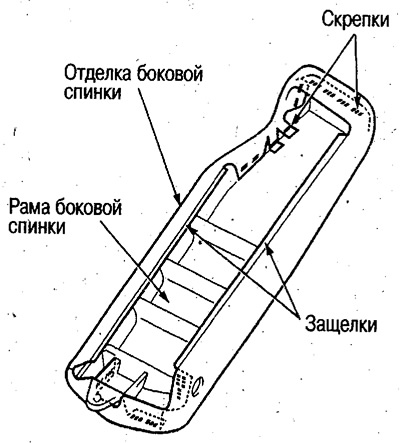
Lateral back of a rear seat
Remove the rear seat back (see above).
Install in the reverse order of removal.
Install latches correctly (MAX 1005F) and make sure that the seams do not separate on the finish, wrinkles do not form.
 |  |